It is 6:40 in the morning in a neighborhood park. An old instructor steps forward on one foot, his single broadsword drawing a clean arc through the air. Beside him, a new student tries to copy the move for the third time. His wrist aches, and the tip of his blade keeps drifting off to one side. The problem is rarely strength. In most cases, the grip, the power source, and the footwork are simply not working on the same beat. This guide fixes those three things, in that order, so a complete beginner can start practicing the Chinese broadsword — known as the dan dao, a single-edged, single-handed sword — with a method that actually holds up.
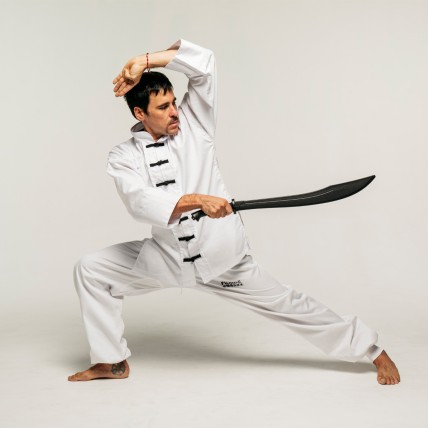
The Grip: Get Your Hand Right Before You Talk About Power
The dan dao is a one-handed weapon, so the grip decides whether the blade path stays stable. The standard hold is simple: the web of your hand sits against the base of the handle, the four fingers close naturally around it, the thumb presses against the side of the index finger, and the palm leaves no gap. Many beginners squeeze the handle as hard as they can from the first minute. Within ten minutes, the forearm goes stiff, and every cut after that gets worse.
The right feeling is “firm but not rigid.” Tighten at the instant of the cut, then let the fingers relax slightly as the blade returns, so the wrist keeps room to adjust. Here is a quick check: hold the sword vertically in front of you, tip pointing up, then lift your thumb. If the blade tips outward the moment you let go, your palm is not seated firmly enough — slide the web of your hand half a finger forward. Another common mistake is gripping too far back, so the butt of the handle digs into the fleshy base of the little finger. The blade head then feels heavy, and the wrist is forced to bend backward on every downward cut. Grip the front-middle section of the handle instead, leaving about one finger-width of tail end as a buffer. Your wrist will stop buzzing after each chop.
Do not rush into routines during your first week. Spend five minutes a day on empty-hand grip drills: stand in place and point the blade forward, upward, and diagonally downward, holding each position for three seconds while checking that your wrist stays in a straight line. The moment the wrist bends, the tip drifts — this drill builds hand feel faster than anything else. If you do not own a practice sword yet, an 80-centimeter wooden stick works fine for this stage. Get the hand shape steady first, then pick up the real training tool.
Four Core Cuts: Chop, Slash, Rising Cut, and Block
The broadsword has many techniques, but beginners should master four first: the downward chop (pi), the diagonal slash (kan), the rising cut (liao), and the intercepting block (jie). The chop travels straight down from above, with power landing on the front third of the blade. The force comes from dropping the shoulder and sinking the elbow, not from swinging the whole arm in a circle. Stand about one and a half arm-lengths from your target, picture a fixed point where the tip should land, and chop ten times in a row. If the landing points scatter, your shoulder is moving first — change the order so the wrist leads the blade.
The slash moves diagonally, most often from upper right to lower left. Turn your waist half a circle first, then let the blade follow. Beginners who move only the arm produce a soft, limp slash and end up with sore shoulders after a few weeks. Remember the sequence: feet steady, waist turns, blade arrives. If any of the three is half a beat late, the cut loses its structure. The rising cut sweeps upward from below along an arc, useful for answering an attack aimed at your lower body. Keep the tip below eyebrow height during practice — any higher, and you open your own guard.
The block is a defensive technique. Use the middle section of the blade to meet an incoming weapon, then guide it outward with a “sticking” feeling rather than smashing into it head-on. The classic beginner error is extending the arm dead straight, which turns the whole arm into a lever that collapses under pressure. Keep the elbow slightly bent for shock absorption, step your front foot half a step forward, and press your weight into the block. That is what makes it hold.
Train these four with a simple formula: 50 repetitions of each single cut, then 20 sets of two-cut combinations such as chop-into-rising-cut or slash-into-block. Practice three times a week, 30 minutes per session. After a month of that, your blade path will look visibly different. Practice in front of a mirror or ask a partner to watch — you cannot see your own blade path drifting when you are looking down at it.
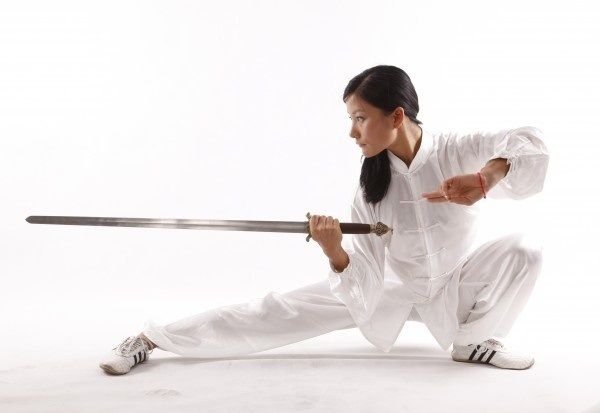
Footwork: Wherever the Blade Goes, the Foot Follows
There is an old saying in Chinese sword practice: the blade is an extension of the hand, and the step is the root of the blade. Without footwork, even beautiful cuts are just posing in place. Start with three steps: the bow stance, the horse stance, and the follow step. The bow stance powers chops and slashes. Step forward about two and a half foot-lengths, straighten the back leg, and put roughly 70 percent of your weight on the front foot. At the instant of the chop, the ball of the front foot must press firmly into the ground — a light tap will not carry the cut.
The horse stance supports blocks and defense. Stand with feet about two shoulder-widths apart, knees pushed outward, weight sunk low. Many beginners shake before 30 seconds in this stance, which simply means the legs need more work. Start with one minute a day, add ten seconds each week, and when you can hold three minutes without wobbling, your blocks will feel steady on their own. The follow step connects advance and retreat: the front foot steps in, and the back foot immediately follows half a step, so the distance between your feet never changes. That keeps your body from stretching apart during continuous cuts.
The best coordination drill is called “one step, one cut.” Step into a bow stance and chop once. Follow-step back and return the blade. Step in again and slash once. Practice slowly at first, pausing one second per step to check your posture, then build up to about 20 cuts per minute once the shapes are clean. When blade and feet can advance and retreat together, you have passed the beginner threshold. The next level is “step-in rising cut” and “step-back block” — attacking while advancing, defending while retreating — which teaches you how the blade path changes between moving forward and moving back.
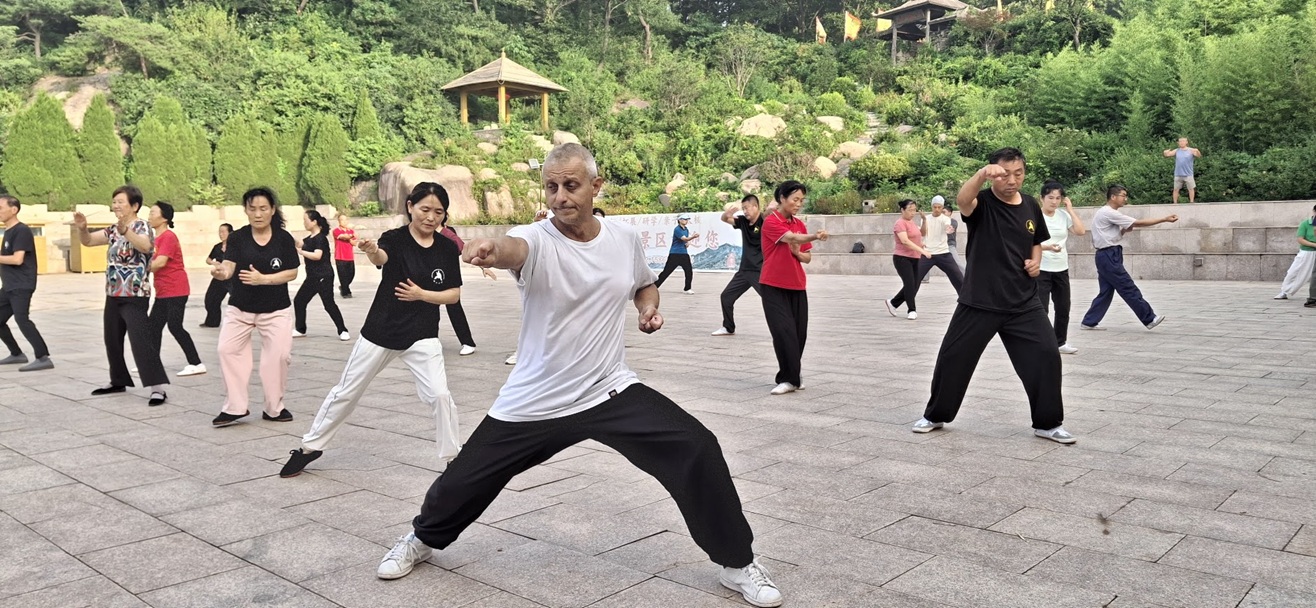
A typical morning-park scenario shows why distance matters. In a space about 10 meters square, two partners train together: one cuts, the other steps back, keeping roughly one and a half arm-lengths between them. Too close and you risk contact; too far and the cuts lose all feeling. That distance is the sweet spot for footwork practice. Before you start, clear stones and puddles from the ground. If the surface is wet and slippery, switch to stationary drills rather than forcing footwork.
Safety and a 4-Week Beginner Plan
The most overlooked part of beginner practice is the training environment. You need flat, open ground with at least 3 meters of clear space in every direction, so nobody walks through the arc of your blade. When training with a partner, keep more than 2 meters apart, take turns cutting, and never rush or compete for speed. Between sessions, store the sword in its sheath or bag. When carrying it, point the tip downward — never walk through a crowd holding a bare blade.
Warm up for ten minutes before touching the sword: 20 wrist circles, 20 shoulder rolls in each direction, and 30 seconds of bow-stance leg presses on each side. If you have an old wrist injury or shoulder trouble, cap your first sessions at 15 minutes, and stop to stretch at the first sign of soreness instead of pushing through. Finish with five minutes of cool-down — shake out your arms, rotate your waist, and let the muscles settle slowly.
Here is a four-week plan to follow. Week 1: grip and empty chops only, 15 minutes a day. Week 2: add the slash and the rising cut, 50 repetitions of each single technique. Week 3: add footwork coordination with the one-step-one-cut drill. Week 4: practice two-cut combinations and the step-back block. Train three to four times a week with at least one rest day between sessions, so your wrists and shoulders recover. After a full month, consider learning a routine from a teacher. Jumping into a routine before the basics are solid builds crooked habits that cost far more time to fix later.
Quick Answers
How long until my cuts look clean? Expect the blade tip to stop wandering after about four weeks of three sessions per week. The landing points of your chops will cluster tighter, and your advance-and-retreat footwork will stop falling apart. There is no shortcut: grip, four cuts, and footwork, practiced in that order.
Do I need a teacher, or can I learn alone? You can build the basics alone with a mirror and this guide, but get an experienced teacher to check your form at least once after the first month. They will catch small faults you cannot see yourself, such as a wrist that bends a few degrees on every chop.
What should I practice if I only have 15 minutes? Five minutes of grip drills, five minutes of single cuts (50 chops), and five minutes of one-step-one-cut footwork. That covers all three pillars without rushing any of them.
Can I practice with a real sharpened sword? No. Beginners should always train with an unsharpened practice weapon. A live blade adds risk without adding skill at this stage.
The path from clumsy first swings to smooth, connected movement is not talent — it is showing up three times a week and grinding the basics until they hold. Record a 30-second practice video each week and compare your blade path and footwork over time. The progress will be visible, and it will keep you coming back.
Safety note: Always practice with an unsharpened training weapon in an open, flat area with plenty of clearance around you. Keep a safe distance from training partners and take turns cutting. If you have joint problems or feel pain, stop and consult a qualified professional. This article is a cultural and fitness introduction to traditional Chinese sword practice and does not promise any combat or self-defense effect. Safety comes first, always.