Six months into tai chi, and one move still trips you up every single time: Fair Lady Works the Shuttles. The moment you change direction, your feet forget where to land, your shoulders creep up toward your ears the instant your hands rise, and the whole sequence turns into shuffling in place. If that sounds familiar, you are not alone — this is the move where most Yang-style beginners stall. This guide takes the single form apart, step by step. Practice it three times following the breakdown below, and your footwork and hand shapes will finally line up.
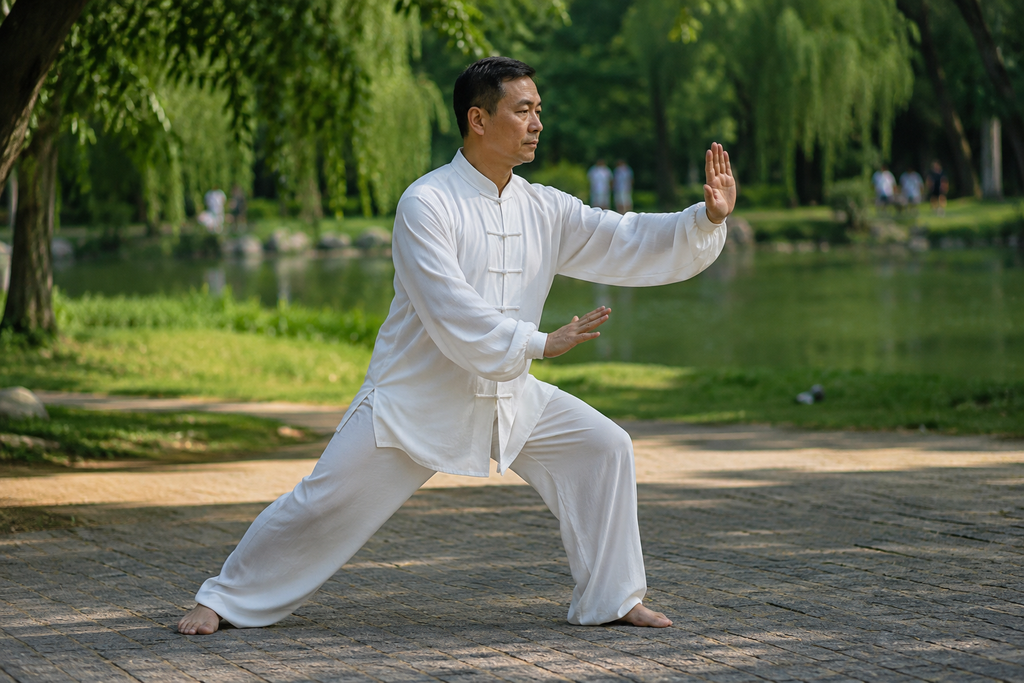
Fair Lady Works the Shuttles — Yu Nu Chuan Suo in Chinese — is one of the classic single forms of Yang-style tai chi. The name sounds delicate, but the move is a serious test of your lower body. Its secret is not pretty hands. It is the body turning through four directions in a row: front-left, front-right, back-left, back-right, with every turn pairing a bow stance with a threading palm. Most people end up waving their arms in place because they memorized the hand path and forgot the footwork underneath it.
In the traditional form, the movement repeats four times, once per direction, and the four landing points trace a diamond on the floor. Get one direction right first: stance solid, palm threaded to the right place, then move on to the next. Ten minutes a day on a single direction is enough. The power comes from the waist — in tai chi this principle is called “the waist leads the hands”: however far the waist turns, that is how far the hands travel.
Step-by-Step Technique: Seven Steps from Opening to Closing
Start facing straight ahead, left foot forward, right foot back, about 70 percent of your weight on the left leg. Take the form apart into seven steps. Finish one step before starting the next — do not rush the transitions.
Step 1: Drop the Shoulders, Sink the Elbows, Hold the Ball
Bring both hands together in front of your chest, left hand above, right hand below, palms facing each other, as if you were holding a ball about 30 centimeters across. Let your shoulders drop and your elbows sink slightly, leaving a fist-sized gap under each armpit. This is your home position — you will return to it between every direction change.
Step 2: Turn the Waist, Step Out with the Left Foot
Turn your waist about 15 degrees to the left and step your left foot toward the front-left. Heel touches down first, then the whole sole settles. The step is roughly one and a half shoulder-widths long. As the foot lands, check that your knee points in the same direction as your toes — never let it collapse inward.
Step 3: Shift Your Weight Forward, Thread the Left Palm
Slowly move your weight onto the left leg until it bends into a bow stance, front knee staying behind the toes. Your left hand threads forward and upward from the chest, palm tilted up, rising to eyebrow height. At the same moment, your right hand separates toward the back-right, palm facing down. The two hands pull apart like a bow being drawn.
Step 4: Close the Step, Turn, Change Direction
Bring your right foot in toward the left foot, toe touching the ground, weight returning to the middle between both feet. Turn your waist to the right and let your body follow toward the front-right. Do not twist with your feet — the waist and hips drive the turn, and the knees follow the toes the whole way.
Step 5: Step Out with the Right Foot, Thread the Right Palm
Step your right foot toward the front-right, heel first. Shift forward into a right bow stance and thread your right hand forward and upward, left hand separating toward the back-left. It is a mirror image of Step 3, and the checkpoints are identical: knee aligned with toes, shoulders dropped.
Step 6: Repeat Twice More to Complete the Diamond
Do the same sequence toward the back-left and the back-right, four directions in total. The third and fourth turns are where most people lose the thread. Before each change of direction, pause for half a second, look toward where you are about to go, and only then let your feet follow your gaze.
Step 7: Close and Return to the Opening Position
After the fourth threading palm, bring your feet together and hold the ball again in front of your chest, back where you started. If the front of your thighs burns, that is normal — the muscles are working. If you feel pain inside the knee, your posture is off: stop and check the alignment before continuing.
Footwork and Hand Shapes: Feet Trace a Diamond, Hands Trace Arcs
The footwork is the skeleton of this form. Connect the four landing points and you get a diamond, each side roughly 60 to 80 centimeters long. A practitioner around 170 centimeters tall will find a step of about 65 centimeters comfortable; if you are under 160 centimeters, 50 to 55 centimeters is plenty. Decide on your landing spot before you step — never change your mind halfway through the move.
The bow stance has exact requirements. The front leg bends with the knee directly above the toes in a vertical line, the shin nearly perpendicular to the floor. The back leg stretches out naturally behind you, heel staying on the ground. Keep about 20 centimeters of sideways distance between the two feet — never place them on the same straight line, or you will wobble like walking a tightrope.
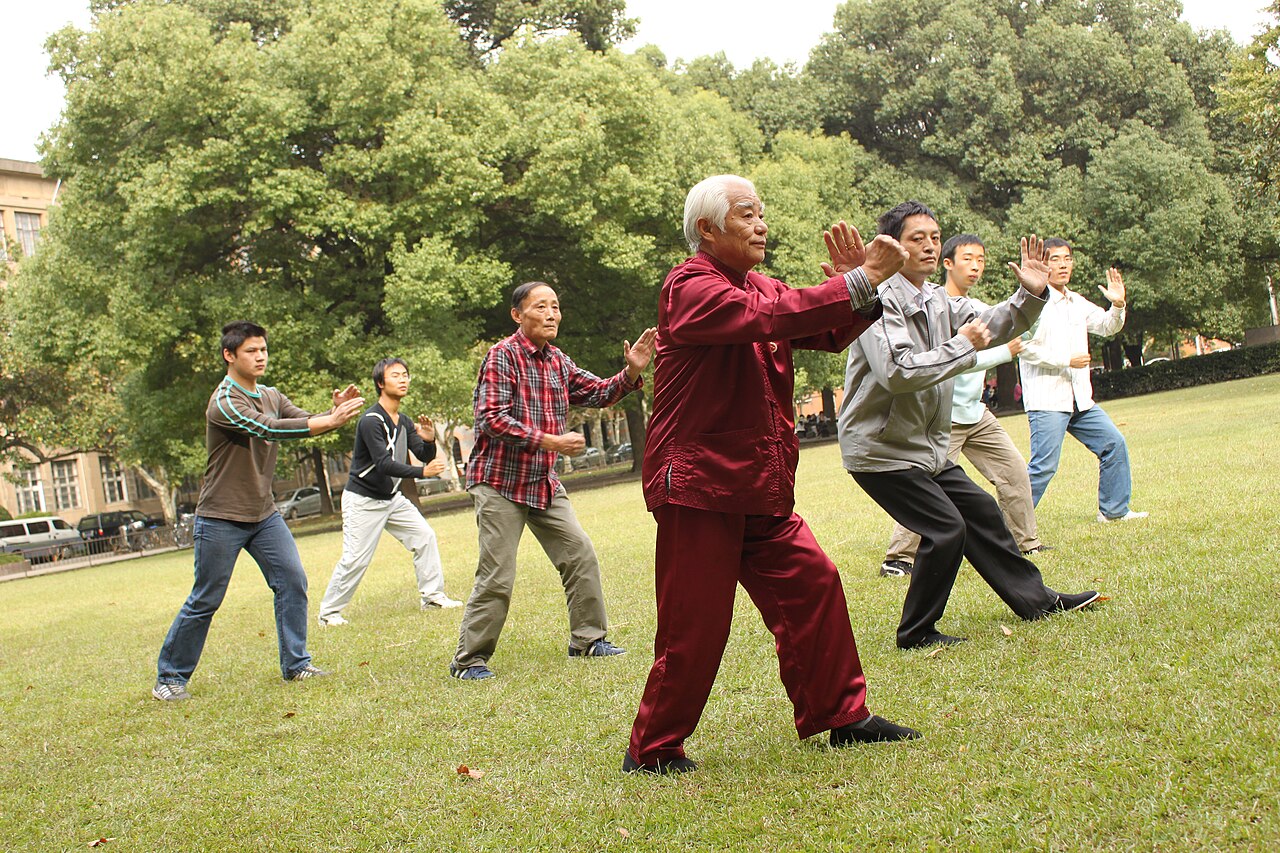
There are two hand shapes to master. The threading palm faces diagonally upward, fingers naturally spread, fingertips slightly raised. The separating palm faces down, fingers together, fingertips pointing outward. Both need a relaxed wrist — a stiff wrist makes the whole arm stiff. The hand-foot coordination has one rule worth memorizing: the foot lands as the hand arrives, and the foot lifts as the hands gather. The instant your heel touches down, your threading hand should reach its final position; the moment your toes leave the ground, both hands return to hold the ball at your chest. Your eyes follow the same rule: wherever the hand goes, the gaze goes with it.
Breathing: Inhale to Gather, Exhale to Thread
Breathing in Fair Lady Works the Shuttles follows one simple rule: inhale as you gather, exhale as you thread. As your hands come together and your weight draws back, breathe in slowly through your nose until your lower belly swells slightly. As your hand threads forward and your weight shifts ahead, breathe out gently through your mouth — never dump all the air at once. One direction takes about four seconds: two seconds in, two seconds out.
Two breathing mistakes show up constantly. The first is holding your breath: the moment the palm threads out, beginners lock their breathing without noticing, and finish the round feeling dizzy. The second is breathing too shallowly, moving only the chest. The fix for both is to slow down by half and make sure one full breath covers one full direction. The half-second when you change direction is the turning point of the breath: as your weight returns to the middle, your exhale ends and the next inhale waits. Do not rush the inhale — stand steady first, then begin the next direction.
Common Mistakes: Check Yourself Against These Five
Eight out of ten people practicing Fair Lady Works the Shuttles will catch themselves making at least one or two of the five mistakes below. Checking them off is worth more than ten extra repetitions done wrong.
- Mistake 1: Knees collapsing inward. In the bow stance, the front knee caves in while the toes point outward, so knee and toes no longer line up. Over time, the inside of the knee starts to ache. Fix it by glancing down once the stance is set: if the knee points toward your second toe, the alignment is right.
- Mistake 2: Weight stuck on the back leg. The front foot steps out, but your weight never leaves the back leg — the front foot only touches the ground lightly, and your body leans backward. Test it: once in the bow stance, try lifting your back heel three centimeters off the ground. If you cannot stay steady, your weight has not really shifted forward.
- Mistake 3: Shrugged shoulders and raised elbows. The moment the hand threads out, the shoulders rise to the ears and the elbow tips flare upward, leaving the whole arm rigid. Fix it by sinking your shoulders before each threading palm, keeping the elbow tips pointing toward the ground, and doing ten shoulder drops as a warm-up before every practice.
- Mistake 4: Turning with the feet instead of the waist. When changing direction, the feet twist first while the waist stays behind, wringing the upper and lower body against each other — and the knees take the punishment. Fix it by turning the waist first: the waist turns, the feet follow, and the knees track the toes throughout.
- Mistake 5: Moving too fast. Four directions in under a minute means less than fifteen seconds per direction, and footwork, hand shapes, and breathing all fall apart. Fix it with a timer: at least twenty seconds per direction, and no less than ninety seconds for all four directions plus the closing. Once you slow down, the errors surface on their own.
Quick Answers
How long should one full round take? At least ninety seconds for four directions plus the closing. A single direction deserves twenty seconds or more — four seconds of it is one slow breath in and out. If you finish in under a minute, you are practicing speed, not tai chi.
How big should my steps be? Each side of the diamond is roughly 60 to 80 centimeters. As a rule of thumb, take about 65 centimeters if you are around 170 centimeters tall, and 50 to 55 centimeters if you are under 160 centimeters. Shorter steps with correct alignment always beat long steps that strain the knees.
Which direction do I face first? Start facing forward and thread toward the front-left first, then front-right, back-left, and back-right. Practice a single direction on its own for a week before chaining all four together.
My knees hurt — should I keep going? Muscle burn in the front of the thigh is normal; sharp or persistent pain inside the knee is not. Reduce the depth of your bow stance or stop and check the knee-toe alignment. If pain continues, see a doctor before practicing again.
What is a realistic 4-week plan? Week 1: practice only the front-left direction, ten minutes a day — step, thread, close. Week 2: add the front-right direction and alternate, fifteen minutes a day. Week 3: walk all four directions, twenty minutes a day, focusing on the waist turn between directions. Week 4: fold the form into your full tai chi routine and practice the complete set twice a day. After a month, your footwork should stay steady and your hands relaxed.
Fair Lady Works the Shuttles is hard because feet, hands, and waist must arrive at the same moment — but each part on its own is simple. Feet trace a diamond, hands trace arcs, and the waist is the axis every turn starts from. Breathe in to gather, out to thread, four seconds per direction. Correct beats fast, every time.
Practice gradually and within your limits. Start with a smaller bow stance and deepen it only as your legs grow stronger. If you have any medical conditions or joint problems, consult a doctor before starting, and adjust the intensity to your own situation. This article is a cultural and instructional introduction to tai chi; it makes no promise of any health benefit. If you feel persistent pain while practicing, stop and seek medical advice.