Picture this: you have been practicing Tai Chi for two or three years, and the whole 24-form routine finally flows — until you reach Cross Hands. Your hands freeze halfway to your chest, your feet forget where to go, and you end up standing there like someone nailed to the floor. If that sounds familiar, you are not alone. Cross Hands (Shizi Shou, literally “crossed-hands posture”) is the move that quietly tests everything you have learned. Get it right, and the closing movement that follows — and the flow of the entire form — suddenly feels much smoother.
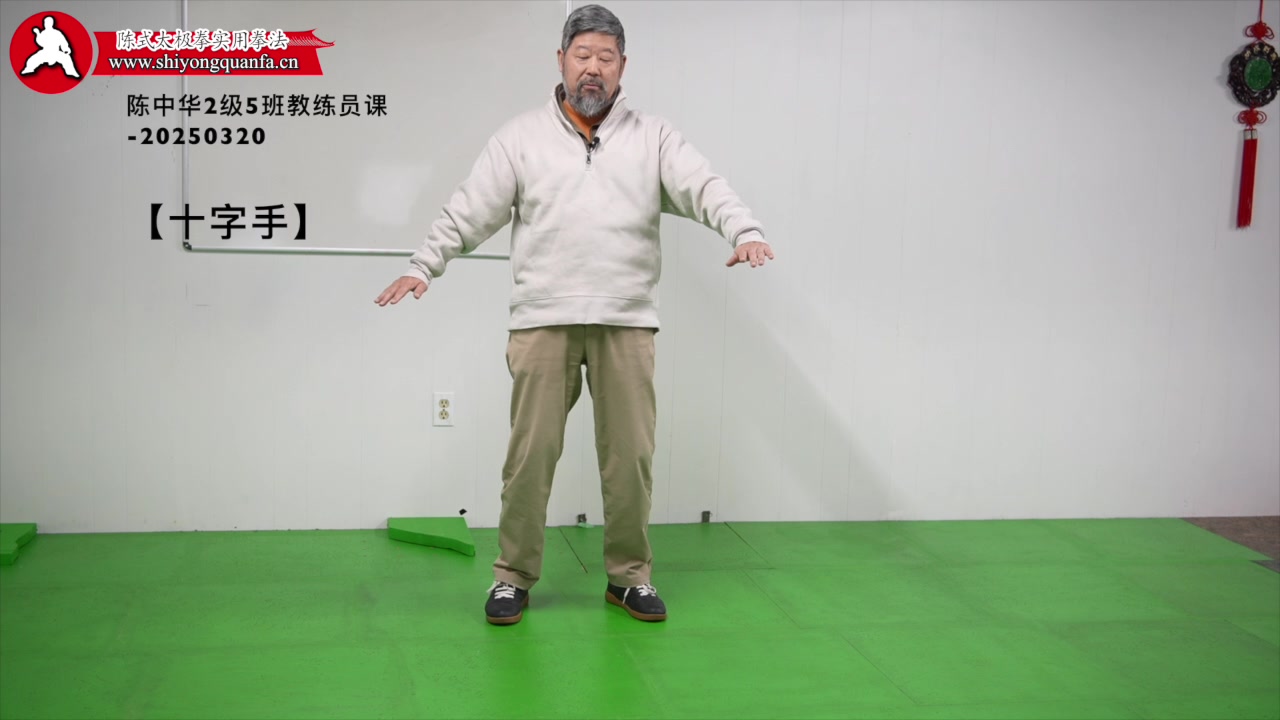
Cross Hands is the second-to-last posture of the 24-form Tai Chi, the simplified routine taught in parks and community classes across China. It looks simple — step out, cross your arms — but it packs three skills into a single movement: footwork, hand shape, and breathing. This guide takes it apart piece by piece, so you can practice each part on its own and then put it back together.
Where Cross Hands Comes From — and Where It Goes
Cross Hands follows Single Whip, the posture where your left hand hooks and your right palm pushes forward, your weight settled on your left leg. From there, your right foot steps out to the front-right, toes turned out about 45 degrees, while both hands sweep in from the sides and cross in front of your chest — right hand outside, left hand inside, both palms facing toward you.
Three ideas hide inside that simple description. First, the hands come together without hugging yourself: your forearms stay about a fist’s width from your chest — not pressed against it, not propped up under your chin. Second, your shoulders sink without collapsing: let the elbows drop slightly and keep your chest from puffing out. Third, the finishing posture must be steady: about 60 percent of your weight on the right leg and 40 percent on the left, knees tracking over the toes. If you can hold it still for three seconds without wobbling, the posture is complete.
Do not rush the speed. Take 8 to 10 seconds to walk slowly from Single Whip into Cross Hands, and repeat it 20 times a day. Within a week, the path of the movement starts to live in your muscle memory.
Footwork: One Step Decides Whether the Whole Posture Holds
Cross Hands has only one step — the right foot moving to the front-right. Yet this single step is where most mistakes happen, and the cause is usually the placement and the angle of the foot.
Land your right foot about one and a half foot-widths to the front-right of your body, toes turned out roughly 45 degrees. The heel touches the ground first, then the whole sole settles. As your weight shifts forward, keep the ball of your left foot on the ground; only when more than 60 percent of your weight has moved should the left heel lift halfway. Think of pushing open a heavy door: your weight presses forward slowly, it never lunges.
Three Common Footwork Problems
- Step too small: Your right foot barely moves half a step, your legs end up almost together, and your weight gets squeezed into the middle — you cannot stand steady. Fix it by drawing two lines on the ground: your right foot should land about 30 centimeters ahead of your left. Practice 10 times until the distance feels natural.
- Toes turned inward: Your right toes point straight ahead or even inward, and your knee follows them inward. After a while your knee starts to ache. After each step, glance down and check that your toes are turned out about 45 degrees. Once the habit forms, you will not need to look anymore.
- Weight lunging forward all at once: The moment your right foot lands, your whole weight crashes onto it, your body tips forward, and your left foot gets dragged along. Count to three as you practice: one is the foot landing, two is the weight shifting halfway, three is standing steady. Only then settle into the posture.
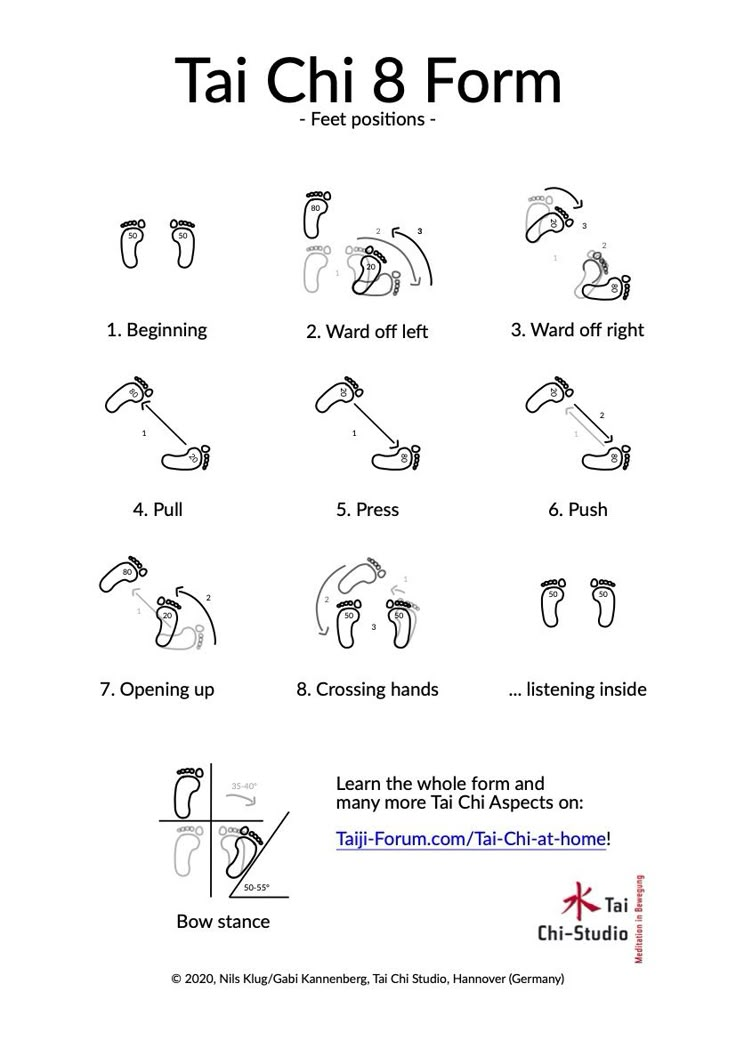
Hand Shapes: Crossing Is Not Enough — Palms and Wrists Matter Too
The hand shape in Cross Hands has two layers: the shape of each palm, and the height and depth of the crossing itself.
Keep your palms naturally open, fingers slightly spread and gently curved — as if you were loosely holding an egg in each hand. Do not clench a fist, and do not stiffen your fingers straight. Your wrists stay level, the heels of your palms sink slightly, and your fingertips point upward and outward at about 30 degrees. Many people unconsciously flip their wrists inward as they cross, pressing their palms downward — and the moment that happens, the shoulders tighten and the whole upper body locks up.
When the hands cross, the right hand stays outside and the left hand inside, with the crossing point at the center of your chest, roughly level with the Danzhong point — in traditional Chinese medicine, the acupoint at the center of the chest, midway between the nipples. Your right wrist rests just outside and above your left wrist, about two finger-widths apart, so the two forearms form a flat cross rather than stacking into two layers. Once crossed, point both elbows downward and let them open outward about 15 degrees, leaving a fist-sized gap under each armpit. Squeeze them shut and your breath cannot rise; flare them too wide and the shape falls apart.
Check yourself in a mirror: after settling into the posture, is the crossing point at the center of your chest, and are both elbows pointing down? If your right elbow is sticking up, your right shoulder has not sunk yet — drop it two centimeters and try again.
Breathing: Exhale as the Hands Close, Inhale as You Settle
The breathing for Cross Hands is simple. Remember one rule: exhale as the hands come together, inhale as you settle into the posture.
As you move from Single Whip into Cross Hands and your hands sweep toward your chest, breathe out slowly for about four seconds, matching the speed of your hands. As you exhale, let your abdomen draw in slightly — do not force the air out, and do not empty your lungs completely; keep about 20 percent of the breath in your chest and belly. Once you are steady in the posture, breathe in naturally through your nose for about three seconds, letting the breath sink to your lower abdomen while your shoulders drop a little further.
Beginners most often hold their breath without noticing, then run out of air halfway through the hand movement. Count in your head while you practice: one, two, three, four as the hands close and the breath flows out; one, two, three as you settle and the breath flows in. After about two weeks of counting, your breathing and your movement will fall into the same rhythm.
If your chest feels tight after practice, your exhale was probably too fast and your inhale too shallow. Slow the exhale by one more second, and the tightness usually eases. Breathing always follows the movement — never change the rhythm of the movement just to fit the breath.
Five Mistakes, Fixed One at a Time
Most Cross Hands problems cluster in five places. Fix one at a time, and only move on to the next once the first one is steady.
Mistake 1: Hands Crossed Too High, Propped Under the Chin
When the crossing point creeps up, your shoulders inevitably hunch and your neck tenses. After settling into the posture, tap the center of your chest with your left index finger — the crossing point should sit within two finger-widths of that spot, up or down. Do this check every time for five days, and the sense of the right height will build itself.
Mistake 2: All the Weight on the Right Leg, Left Leg Dangling
The posture calls for a 60–40 split. If all your weight lands on the right leg, your left foot leaves the ground and your body tips forward. After settling, try lifting your right heel gently: if it will not lift, your weight is too far over. Adjust until your right heel can lift lightly while the ball of your left foot stays on the ground — that is the 60–40 position.
Mistake 3: Knee Pushing Past the Toes
When the right leg forms its bow stance, letting the knee jut past the toes loads the joint noticeably. Practice sideways to a mirror: the knee and the toes should line up vertically, and if the knee passes the toes by more than a finger’s width, take a half-step longer. If you have an old knee injury, keep the bow stance shallower rather than forcing the depth.
Mistake 4: Over-Tucking the Chest Until the Back Rounds
In trying to sink the shoulders, some people round their back like a shrimp, collapsing the chest completely. The correct “containing the chest” — a Tai Chi term for a slight inward hollow of the chest with the back gently rounded — feels like hugging a large watermelon, not caving in. Stand tall first, then draw your chest back about 20 percent. That is the right amount.
Mistake 5: Eyes Wandering, No Focus in the Finishing Posture
In the Cross Hands finishing posture, your gaze should rest level and forward, on a point about three meters ahead at eye height. When the eyes drift, the weight drifts with them and the whole posture loosens. Stick a small dot on the wall in front of you and hold your gaze on it for three seconds after each settling — the habit forms quickly.
Your Three-Week Practice Plan
Cross Hands breaks down into just three things: one right-foot step landing in the right place, two hands crossing at the center of your chest, and breathing that follows the closing of the hands. Spend 10 minutes a day on the short sequence from Single Whip through Cross Hands to the closing movement, repeating it 15 to 20 times, fixing one flaw at a time. In five weeks the posture will feel far more stable.
- Week 1 — Footwork only: Practice in front of a mirror and check the toe angle and the weight split on every rep.
- Week 2 — Add the hands: After each settling, check the height of the crossing point and the direction of your elbows.
- Week 3 — Add the breathing: Count as you practice so the exhale and the closing of the hands move together.
Once the three weeks are done, Cross Hands is essentially formed — and the next time you practice the full form, its flow will feel noticeably smoother. Tai Chi rewards a little progress every day, not a single day of cramming. When the second-to-last posture stands on solid ground, the whole 24-form routine gains a confident ending.
Quick Answers
Where does Cross Hands sit in the 24-form routine? It is the second-to-last posture, coming right after Single Whip and just before the closing movement. That position is exactly why it matters so much: a shaky Cross Hands makes the ending of the whole form feel rushed.
How much weight goes on each leg? About 60 percent on the right leg and 40 percent on the left. A quick test: after settling, you should be able to lift your right heel lightly while the ball of your left foot stays planted.
Why do my shoulders tense up during Cross Hands? Usually the crossing point is too high or the wrists have flipped inward. Drop the crossing point to the center of your chest, level your wrists, and let the elbows point down — the shoulders will follow.
Can I practice Cross Hands on its own, or only inside the full form? On its own is actually better for learning. Practice just the short passage from Single Whip through Cross Hands to the closing movement, 15 to 20 times a day, and the full form will benefit.
How long until it feels natural? Most people find the foot placement and hand path settle into muscle memory within one to two weeks of daily practice. The breathing takes a little longer — give it three weeks before you expect it to feel automatic.
Safety note: Practice gradually and within your limits. Keep the range of motion comfortable — do not force a deep squat or twist your knees sharply. If you have knee or back issues, high blood pressure, heart conditions, or any other health concern, consult a qualified professional or your doctor before practicing, and train under professional guidance. Choose a flat, non-slip surface, wear flat soft-soled shoes, warm up before practice, and do not sit down immediately or drink large amounts of water right after finishing.