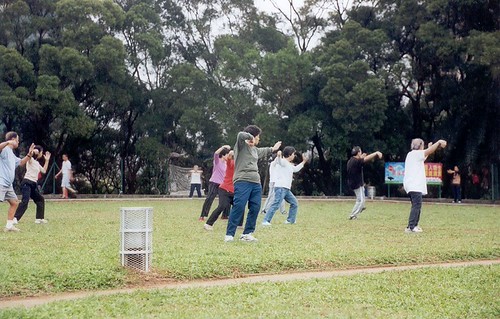
Seven in the morning, at the neighborhood park. The tai chi group has just finished Cloud Hands, their arms circling in slow, even waves. Then one woman steps to the left, her palm cutting forward through the air while her other hand sweeps back — and suddenly the whole form looks different. Sharper. More alive. That is Step Back and Whirl Arms, the 15th movement of the 24-form. Most beginners stall right here: the hands push out, but the feet never catch up, and the movement ends up looking like a pose struck in place. Get this one right, and the whole idea of “hands and feet arriving together” finally clicks for the rest of the form.
What Step Back and Whirl Arms Actually Trains
In the 24-form sequence, this movement sits between Cloud Hands and Needle at Sea Bottom. Its core is not the pushing palm — it is the bow stance with threading palms: front leg bent, back leg pressing into the ground, both hands crossing past each other like two lines sent forward at once. What you are really training is coordinated whole-body power — hand, foot, and eyes landing on the same beat.
Many beginners practice it as a “palm push,” as if the job is done once the hand goes out. In fact the palm is only the end of the chain. The real power comes from the back leg driving off the ground and the waist and hips turning — what tai chi calls whole-body strength, or zheng jin. The waist moves before the hands do; by the time the palm arrives, the hips have already turned about 45 degrees. Grasp that one point and the movement immediately starts to feel like tai chi.
The movement is done once on each side, left then right, perfectly symmetrical. Work the left side until it feels detailed and clean, then mirror it for the right — that is the fastest way to learn it.
The Left Side, Step by Step
The left side picks up from the closing position of Cloud Hands: your weight sits on the right leg, the left foot touches the ground lightly, the right hand is in front of your chest and the left hand rests below it, the two hands holding an invisible ball between them.
Step 1: Turn the Waist, Separate the Palms
Turn your body to the left, letting the waist lead the hips and the hips lead the legs. Step your left foot forward and to the left, heel touching down first, toes following, pointing toward roughly 11 o’clock. The step should be about one and a half shoulder-widths long — too short and the bow stance has no room to open; too long and your weight cannot follow.
At the same time, the hands separate: the left hand threads out toward the front-left, palm facing outward, at eyebrow height; the right hand opens toward the back-right, palm also facing outward, as if you were pushing open two doors at once. Keep both hands at roughly the same height — one high and one low ruins the shape.
Step 2: Bow Stance and Threading Palm
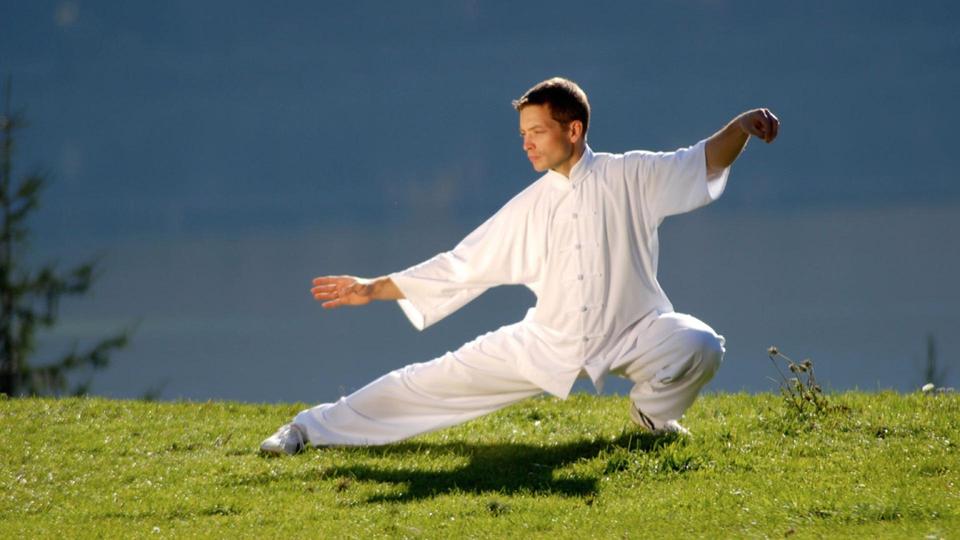
Once the left foot is planted, shift your weight forward into a bow stance: left knee pointing forward, never past the toes; right leg pressing straight back, heel staying on the ground. The left hand keeps threading forward while the right hand draws back to rest under the inside of the left forearm, palm facing up, as if supporting it from below. The feeling of “threading” matters here — the left hand passes over the right, the two arms crossing into a slanted X.
Your eyes follow the movement: look in the direction of the left palm, your gaze passing through the palm toward the distance. Many people stare at the ground at this point, and the whole posture falls apart. Remember, the eyes go where the energy goes.
Step 3: Hold the Posture and Breathe
In the final posture, the left palm sits at eyebrow height, fingers relaxed and naturally open — don’t force them wide. Coordinate the breath: inhale as you turn the waist and separate the palms, exhale as you step into the bow stance and push the palm out. One breath in, one breath out completes the movement. Never hold your breath; held breath makes the shoulders creep up toward the ears.
Hold the posture for 2 to 3 seconds and check your weight: about 30 percent on the front foot, 70 percent on the back. Once you feel stable, shift your weight back, draw the left foot in half a step, and prepare for the right side.
The Right Side: A Mirror Image With Three Traps
The right side is a perfect mirror of the left: the right foot steps forward-right, the right hand threads forward, and the left hand draws back under the right forearm. The mechanics are identical — but there are three places where beginners copy the left side wrong.
First, step direction. The right foot lands pointing toward roughly 1 o’clock, not 11 o’clock like the left. Get the angle wrong and your body cannot turn properly; the bow stance twists into an awkward diagonal step.
Second, the eyes. Your gaze follows the right hand. After practicing the left side, your eyes get used to watching the left hand, and it is easy to forget to switch — eyes still looking left while the hand pushes right. When hand and eye separate, the movement falls apart immediately.
Third, weight transfer. Moving from the left bow stance into the right step, bring your weight back to center first, between both legs, then shift it to the right. Jumping straight from one bow stance to the other makes your weight wobble and your steps tangle. Give yourself half a beat — settle the weight, then step.
5 Common Mistakes and How to Fix Them
Most errors in this movement come down to hand-foot coordination and weight placement. Here are the five a teacher sees most often — check yourself against each one.
Mistake 1: Hands Move First, Feet Arrive Late
The palm is already out while the foot is still standing in place, and the movement becomes a one-sided upper-body show. Fix: practice with the phrase “foot arrives, hand arrives” in mind — the moment your stepping heel touches down, the palm should land in position. Practice slowly first, breaking the movement into three beats — step, land, push — then blend them into one beat once the rhythm feels natural.
Mistake 2: Front Knee Goes Past the Toes
The front leg bends too deep, the knee pushes past the toes, loading the knee joint while the weight tips forward. Fix: in the bow stance, aim the knee in the direction of the second toe and keep the knee vertically aligned with the toes. Ask a practice partner to watch from the side — if the knee crosses the toes, pull it back a little.
Mistake 3: Back Heel Lifts Off the Ground
As the weight shifts forward, the back heel pops up, as if you were pushing on tiptoe, and the whole-body power breaks. Fix: imagine the back heel nailed to the floor; the weight moves forward because the waist and hips carry it, not because the body lunges. Try this: slip a thin sheet of paper under your back heel. If it is still there after the movement, your heel stayed down.
Mistake 4: One Hand High, One Hand Low
The threading hand goes too high and the separating hand too low, or the other way around, and the posture looks crooked. Fix: in the final posture, both hands should sit at eyebrow height. Use your peripheral vision to check both hands at once — once the heights match, the posture immediately looks clean.
Mistake 5: Holding Your Breath and Shrugging
The moment you exert force, you hold your breath, your shoulders rise to your ears, and your neck stiffens. Fix: get the breathing smooth first — inhale on the waist turn, exhale on the palm push. It is fine if the breath runs half a beat ahead of the movement. Let the shoulders sink and the elbows drop; the elbow tips should always point downward. Ask a partner to press gently on your shoulders while you practice — if they feel hard as rock, you are not relaxed. In tai chi this relaxed, unforced state is called song — not limpness, but a body with no unnecessary tension, so that qi, the body’s vital energy in traditional Chinese thought, and the movement itself can flow without obstruction. Keep that idea in mind, and let it settle in the dantian, the energy center just below the navel that tai chi treats as the body’s center of gravity and the source from which movement originates.
A 15-Minute Daily Practice Plan
You do not need to drill Step Back and Whirl Arms on its own for long stretches — it works best nested inside your daily 24-form practice. Here is a 15-minute plan that fits a morning or evening session.
- First 3 minutes: standing warm-up. Feet shoulder-width apart, knees slightly bent, hands holding an imaginary ball in front of your chest. Breathe 10 times and let your shoulders and hips relax.
- Middle 8 minutes: single-movement repetitions. Alternate left and right, 10 reps per side. Do the first 5 slowly to polish the details, the next 5 at normal speed. Focus on the feeling of foot and hand arriving together.
- Last 4 minutes: linked practice. Start from Cloud Hands and flow through Step Back and Whirl Arms, Needle at Sea Bottom, and Flash the Arm in sequence, 3 times through, feeling how this movement bridges what comes before and after.
After about two weeks, the movement will feel much smoother. Your test: stable weight, smooth breathing, relaxed shoulders. When all three are there, you have got the basics of this movement.
Quick Answers
Why is this movement so hard for beginners? Because it demands three things at once — stepping, turning, and threading the palms — on the same beat. Most people have trained their hands and feet to work separately. Slow practice, broken into three beats, is the fix.
How deep should the bow stance be? Front knee aligned with the toes, weight about 30 percent front and 70 percent back. If the front knee passes the toes or the back heel lifts, you have gone too deep.
Should the eyes follow the hands or look straight ahead? Follow the threading hand. Your gaze passes through the palm toward the distance — eyes lead, energy follows.
Can I practice this movement alone, outside the full form? Yes. Ten reps per side as a standalone drill is one of the best ways to fix the hand-foot timing, and it fits neatly into a 15-minute session.
How long before it feels natural? About two weeks of daily practice. Stable weight, smooth breathing, relaxed shoulders — when those three hold together, the movement is yours.
Step Back and Whirl Arms trains the bow-stance threading power of the whole body: the back leg drives, the waist and hips turn, and both hands thread forward on a single beat. Polish the left side, mirror it for the right; keep the hands and feet in sync, the front knee behind the toes, the back heel down, both hands level, and the breath unheld — and the movement will stand on its own. Start today: fifteen minutes a day, two weeks, slow first, then smooth — and let the coordination carry over into the full 24-form.
Safety note: Practice gradually, within your ability. Keep the bow stance at a comfortable depth — do not force a longer step than your body is ready for. If you have knee, lower-back, or other health conditions, consult a doctor first before practicing. Stop immediately and rest if you feel pain, dizziness, or any discomfort. This article is traditional cultural education and does not promise any therapeutic effect.