It is 6:30 in the morning, in a corner of the neighborhood park. Old Zhang has just finished Needle at Sea Bottom. His right hand is still hovering beside his right knee, but his left foot has no idea where to go next. Flash the Arms — this one move — has felt awkward for him for three years.
If you have practiced the Simplified 24-Form for a while, you know exactly how he feels. Flash the Arms looks simple from the outside: one step forward, both arms opening. But inside that single beat, the feet, the arms, the waist, the breath, and the eyes all have to arrive at the same moment. This guide breaks it down piece by piece.
Where Flash the Arms Fits: Movement 20 of the 24-Form
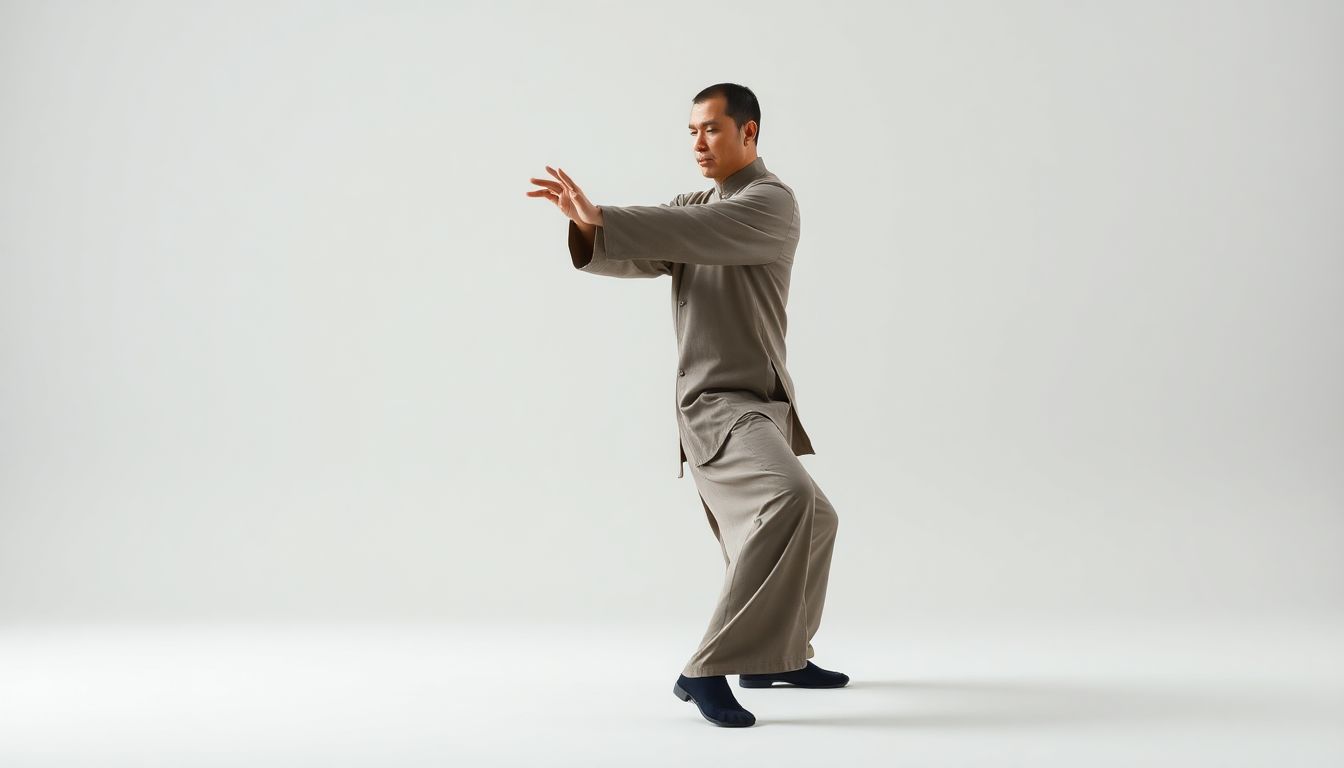
Flash the Arms is the 20th movement of the Simplified 24-Form Tai Chi, and it comes right after Needle at Sea Bottom. At the end of Needle at Sea Bottom, the body leans forward, the right hand presses down beside the knee, the left foot rests lightly behind you, and most of the weight sits on the right leg — energy gathered in the right leg, waist, and hips like a bow drawn and gently released. Flash the Arms takes that gathered energy and turns it upward into an open, forward-reaching movement.
Most beginners lose the rhythm right here. They finish Needle at Sea Bottom and rush to lift the left foot while the upper body is still bent forward and the head is still down — the foot steps out while the torso is still catching up, and the whole body looks as if it is being dragged forward by a rope. The correct transition has only one rule: stand up first, then step. Finish Needle at Sea Bottom, let the waist and hips return to center, feel the crown of the head lifted as if by a gentle thread, relax the chest, and slowly draw the right hand back from the knee to the waist. Give this about two seconds. Only when the body is steady does the left foot move. Count three beats — draw the hand back, stand upright, step forward — and the movement immediately feels smooth.
There is one detail that is easy to miss: the right hand in Needle at Sea Bottom should not press too low. The fingertips only need to reach about one fist below the knee. Press too deep, and the waist has to collapse with it; then standing back up and stepping forward costs the waist and hips twice the effort. Before your daily practice, run this transition five times on its own. Once those five feel smooth, fold it back into the full form.
The Movement in Three Steps
The whole movement breaks into three steps, and each step has a clear landing point.
Step 1: The Left Foot Steps Forward
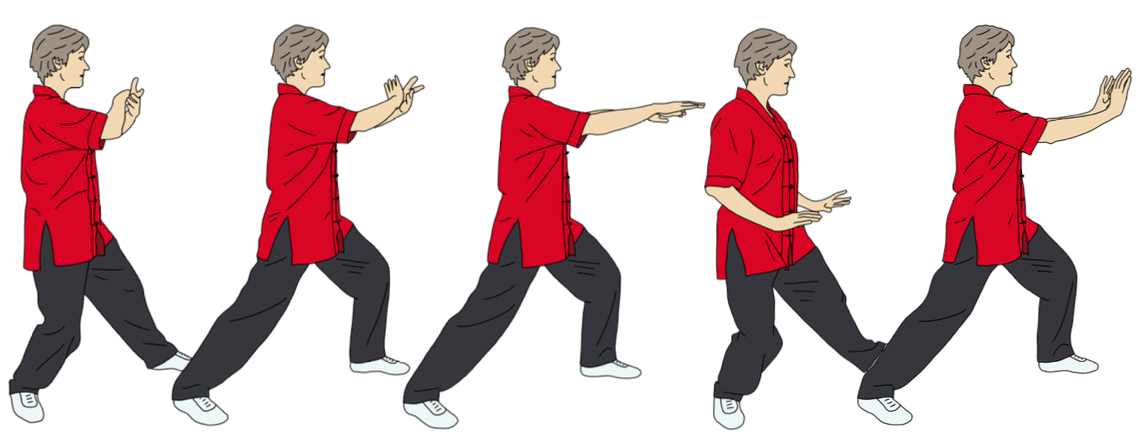
Once the body is upright, lift the left heel first and let the toes brush lightly along the ground as the foot travels forward. The landing point is straight ahead and about 30 centimeters to the left of center, a stride of roughly one and a half foot-lengths. The heel touches down first, then the weight rolls through to the whole sole, toes pointing forward with no more than 15 degrees of outward turn. Do not stamp the foot down. Imagine a thin layer of fallen leaves under your sole — step on them without making a sound. Once the left foot lands, the knee bends slightly and tracks over the toes; never let it collapse inward.
Step 2: Both Arms Open
As the left foot moves forward, both arms open. The right hand pushes forward and slightly upward from the waist, palm facing forward, rising to chest height, the arm slightly bent with the elbow sinking down. The left hand opens to the upper left, palm facing outward, slightly lower than the right hand. The two arms hold each other as if cradling an invisible ball, about a meter apart. The arms must open at exactly the same speed as the foot steps: the moment the foot lands, the arms arrive in position, so the upper and lower body land on the same beat.
Step 3: Shift the Weight Forward into a Left Bow Stance
With the left foot planted and the arms open, slowly shift the weight forward onto the left leg while the right leg pushes straight behind you, forming a left bow stance. The left knee presses forward but never past the toes, and the right heel stays on the ground. Take about three seconds — the slower you go, the more clearly you can feel the waist and hips turning. Hold for one second and check four points: the crown of the head is upright, the shoulders are relaxed, the left knee and left toes are on the same line, and the right sole is fully on the ground. When all four are right, the posture is settled.
Hand Shapes: Palm, Fingers, and Wrist
The hand shapes look simple, but this is where most mistakes hide. As the right palm pushes forward, spread the fingers naturally with the fingertips slightly raised. Do not tense the palm into an iron plate; imagine it holding a ball of cotton — soft, but with shape. As the left palm opens, the fingers point up and to the left, the web between thumb and index finger opens wide, and the wrist stays level — neither collapsing nor bending back too far. Wrist and forearm should form roughly one straight line.
A quick self-check: after opening the arms, glance at your left wrist. A clear crease means the wrist has collapsed; a sore forearm means your fingers are gripping too tightly. Practice in front of a mirror three times a day, watching only the hands — within three days the collapsed wrist will be gone. The shoulders are the other trouble spot: the moment the arms open, they creep toward the ears. Ask a partner to press lightly on them while you move — the moment the shoulders drop, the arms open wider.
Breathing and Gaze: Power Comes from the Waist and Hips
The pattern is simple: inhale as the left foot steps forward and the arms open; exhale as the weight shifts forward and the bow stance settles. Do not force a deep breath — let the air come in naturally through the nose, without puffing out the chest. Exhale with the lips gently closed, matching the three-second weight shift. When the breath goes wrong, the movement rushes. Beginners can ignore the breathing at first and add it once the movement is smooth — never reverse that order.
Let the eyes follow the right hand. As the arms open, look toward the space in front of the right palm; once the bow stance is set, let the gaze rest level ahead, about two meters beyond the right fingertips. Do not stare at your own hands or look around. When the eyes settle, the head stops wobbling, and the weight stays steady. Old practitioners in the park have a saying: when the eyes wander, the energy scatters.
Five Common Mistakes and How to Fix Them
- Mistake 1: Stepping too fast and lunging forward. The left foot has not landed yet and the upper body has already rushed ahead. Fix: let the right leg support you for half a second longer, and only send the weight forward after the left heel touches the ground. Practice ten slow repetitions at half speed.
- Mistake 2: The two arms open out of sync. The right hand pushes out while the left hand is still stuck at the thigh, or the left hand opens first and the right hand lags half a beat behind. Fix: practice with empty hands first, both hands starting from the waist together, counting one, two, three as they open. Only count a rep when both hands arrive at the same time. Do eight reps a day.
- Mistake 3: The right heel lifts as the weight shifts forward. Once the heel leaves the ground, the back leg cannot push straight and the bow stance loses its base. Fix: keep the back heel planted, as if a piece of tape is holding it to the floor. If you cannot stay stable, shorten the stride by 10 centimeters first, and widen it again once you can stand firm.
- Mistake 4: Raised shoulders and a collapsed wrist. The moment the arms open, the shoulders rise to the ears and the wrist folds. Fix: before opening, sink the shoulders and drop the elbows — let the shoulders relax two centimeters downward before the arms move. For a collapsing wrist, lift the fingertips slightly as you open, and the wrist will naturally level out.
- Mistake 5: Pausing too long between Needle at Sea Bottom and Flash the Arms. Some people stop for four or five seconds at the transition, thinking about the next move, and the flow of the whole form breaks. Fix: keep the pause under one second. Do not add extra adjustments between standing upright and stepping — let the three beats flow as one continuous motion.
Make It a Habit in Your Body
Flash the Arms is hard because it is a whole-body movement: the foot steps, the arms open, the weight shifts, and the breath exhales — four things landing on the same beat. Do not rush it. Set aside ten minutes a day for just this one transition, repeating it eight to ten times, and watch three things: is the left foot landing in the right place, are the two arms opening together, and is the right heel staying on the ground? After a week, fold it back into the full 24-form — you will find the transitions before and after it flow much more smoothly.
In the morning, walk through the full form once to warm up, then work on Flash the Arms alone for five repetitions. In the evening, do three slow repetitions in your living room — no special space needed, just two steps of floor. The test: after settling into the bow stance, can you hold still for three seconds without wobbling, shoulders relaxed, breathing steady? When you can, the movement is yours. From there, daily repetition lets your body remember it on its own.
Quick Answers
Which movement is Flash the Arms in the 24-Form? It is movement 20, immediately after Needle at Sea Bottom. The key to the transition is to stand upright first, then step — never rush the foot forward while the body is still bent.
How big should the step be? About one and a half foot-lengths forward, landing roughly 30 centimeters to the left of center, heel first, toes pointing forward with no more than 15 degrees of outward turn.
How do I stop my right heel from lifting? Keep the back heel planted as the weight shifts forward, and shorten the stride by 10 centimeters until you can stand steady. A stable short stance beats a wobbly long one.
How long until it feels natural? Practice the Needle at Sea Bottom to Flash the Arms transition alone, eight to ten times a day. Most people feel the rhythm click within a week, and the three-second hold without wobbling is the sign that the movement has settled in.
Practice safely: progress gradually and within your own limits. If you have old knee or lower-back injuries, shorten your stride and slow down; stop and rest if you feel pain, and do not force yourself to finish the movement. If your balance is unsteady, practice the step and the arm opening while holding a wall or a chair first, and let go only once you are steady. Tai Chi is a form of daily exercise and cannot replace medical care. If you feel unwell, seek medical advice promptly. Nothing in this article promises any therapeutic effect.