It’s 6:30 in the morning. In the pavilion at the corner of the neighborhood park, a 70-year-old woman named Mrs. Wang has just finished the first six movements of her daily routine. Now comes the seventh: “Two Hands Reach the Feet to Strengthen the Kidneys and Waist.” She bends forward to touch her toes, knees locked straight, her lower back arched like a drawn bow, face flushed red. As she comes back up, she wobbles. Li, a teacher who has practiced for ten years, walks over and says quietly, “Soften your waist first. Keep a little bend in your knees. If you can’t reach your toes, hold your shins — that’s fine.” She tries it his way, and suddenly the whole movement flows. That is the whole secret of this seventh movement: it isn’t a contest to see who can bend lowest. It’s about whether your waist can lengthen while it stays relaxed.
What This Movement Actually Trains
“Two Hands Reach the Feet to Strengthen the Kidneys and Waist” is the seventh of the eight movements of Baduanjin — the Eight Brocades, a traditional Chinese qigong set (qigong is a system of slow, breath-coordinated exercises developed over centuries to cultivate health and vitality) that has been practiced for more than 800 years. The first six movements work on the triple burner, the spleen and stomach, the heart and lungs, the five strains and seven injuries, the ribs, and the lower back. By the seventh, the focus narrows to the waist and the kidneys. Traditional Chinese medicine says “the waist is the house of the kidneys” — when blood and qi (vital energy, in traditional Chinese thought) flow freely through the waist, the kidneys have a solid foundation to do their work of storing essence.
In modern terms, the movement is a slow, controlled forward fold. It stretches the muscles and fascia of the lower back, mobilizes the spine, and gently pulls on the backs of the legs. It does not chase range of motion. Reaching the tops of your feet is good; stopping at mid-shin works just as well. There is only one real test: after you finish, your waist should feel loose and warm — not sore and stiff. Before you start, do a quick self-check. Stand with your feet together, lower your chin, and look down toward your toes. If you already feel a sharp pain in your lower back, cut today’s range in half and stop with your hands on your knees.
The Movement in Four Steps
The whole sequence breaks into four stages — setting up, folding forward, reaching the feet, and returning. Each stage has its own hand position, leg position, and waist requirement.
Step 1: Set Up — Stand Steady Before You Move
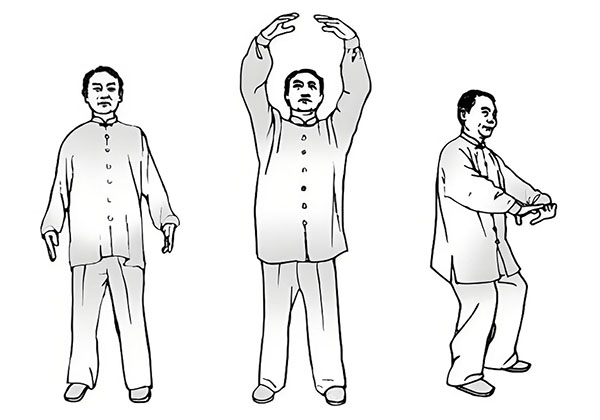
Stand with your feet together, toes pointing forward, knees soft and never locked. Let your arms hang naturally, palms resting against the outside of your thighs. Drop your shoulders, tuck your chin slightly, and look straight ahead. Take two slow, deep breaths, letting each one settle into your lower belly, before you begin. Many people rush straight into the fold before their body is steady. The moment your balance wobbles, your lower back takes over to compensate — and that’s where strain starts.
Step 2: Fold Forward — Hinge From the Hips, Don’t Collapse the Waist
Slide both hands slowly down the front of your thighs as your body folds forward, pivoting at the hip joints. Push your hips back and fold from there — do not let your spine collapse downward one vertebra at a time. Imagine a thread gently pulling the crown of your head forward and up, so your spine lengthens as it folds. Keep a slight bend in your knees, about 5 to 10 degrees. That small bend is what protects the knees, and it is also what lets the backs of your thighs feel the stretch.
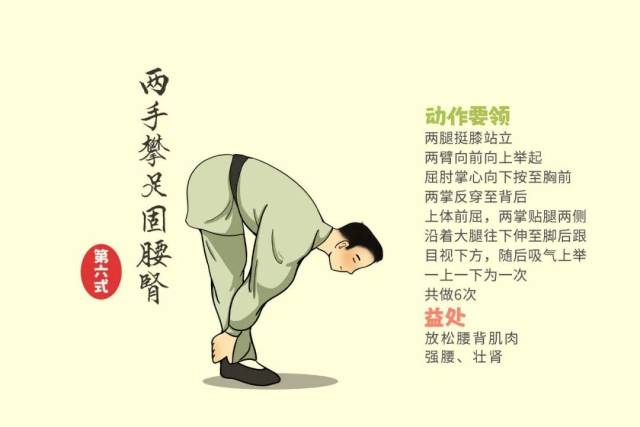
Step 3: Reach the Feet — Wherever Your Hands Land, Your Waist Follows
Keep sliding your hands downward until they reach the tops of your feet or your ankles. The hand shape matters: palms facing down, four fingers together resting on the top of the foot, thumbs hooked around the inner side — as if you were gently “holding” the foot, not gripping the toes with your fingertips. If you can’t reach your feet, hold your shins or your ankles. The benefit is the same. Once your hands are in place, pause for 3 to 5 seconds. As you breathe out, let your waist soften a little more. Let your head hang naturally, and don’t strain your neck by lifting it.
Two things ruin this pause. The first is bouncing downward to grab your toes, forcing your lower back to absorb a sudden load. The second is locking your knees straight in the effort to reach further — that shifts all the stretch into the backs of your knees.
Step 4: Return — Push Yourself Up With Your Hands
Coming back up is not a matter of straightening your waist. Instead, walk your hands back up your legs, as if your palms were “pushing” you upright. Keep your palms against your shins and thighs, rising little by little as your hands travel upward. Once you are fully upright, let your hands rest at your sides, take one steadying breath, and begin the next repetition. Aim for 4 to 6 repetitions, which takes about 3 to 5 minutes. When you finish, place your hands on your hips and make two slow, gentle waist circles to close the practice.
Breathing and Focus: The Rhythm That Holds It Together
Your breath is the metronome of this movement, and two rules are enough: breathe out as you fold forward, breathe in as you rise. After the setup, inhale and let the breath sink to your lower belly. As you fold, exhale slowly and evenly — don’t dump all the air at once and then hold what’s left. During the 3-to-5-second hold at the bottom, breathe naturally, and use each exhale to consciously relax your waist. As you rise, inhale, letting the breath fill gradually as your body straightens.
Most people hold their breath without noticing at the lowest point of the fold, faces going red. That is the single most important habit to break. Holding your breath spikes blood pressure in an instant, which is especially unkind to older practitioners. Here’s a simple check: practice with your lips lightly closed, breathing through your nose. If you catch yourself holding your breath, cut your range in half immediately and find the rhythm again. Don’t force a long exhale, either. A natural rhythm of about 3 seconds in and 4 seconds out is plenty — follow it, and the movement slows down on its own.
Traditional practice speaks of “guarding the waist and kidneys with your attention” — keeping your focus on the waist and kidney area. As you fold, imagine the blood and qi in your waist sinking downward. As you hold the feet, picture your lower back as a bow being gently drawn open. As you rise, imagine warmth rising from your waist. This isn’t mysticism; it’s attention training. Wherever your attention goes, the muscles there relax more easily. “Relax” is the governing principle of this movement: relax the shoulders, relax the waist, relax the knees, and even relax your fingers as they rest on your feet. After one repetition, check in with yourself. Are your shoulders lower than before? Is your neck softer? If your shoulders are creeping higher with every rep, your whole body is straining — shrink the range.
Four Common Mistakes — and How to Fix Them
Mistake 1: Rounding and collapsing the back. As you fold, the spine arches backward into a big curve instead of lengthening. The fix: before you fold, gently lift the crown of your head forward and up, as if your spine were a rope being pulled straight, and only then hinge from the hips. Practice twice in front of a mirror and check whether your back forms one smooth arc.
Mistake 2: Locked knees. Both legs go rigid, knees pressing backward, and all the stretch lands in the backs of the knees. The fix: bend your knees 5 to 10 degrees before you start folding, and keep that soft bend throughout. If you can’t feel it while standing, practice against a wall first — knees slightly bent, almost touching the wall — then begin the fold.
Mistake 3: Holding your breath to force the reach. You hold your breath and push down to grab your toes, face flushed, refusing to come up. The fix: change the goal from “reach my toes” to “let my waist soften a little more on each exhale.” Hold your shins if that’s where you are. Once your breathing is smooth, the range opens up on its own. Many people find, after three months of practice, that their hands reach their feet without even trying.
Mistake 4: Too much range, too fast a return. You bounce down into the fold, then spring back up, and your waist feels whipped around. The fix: take 6 to 8 seconds to fold down and the same to rise, hands sliding along your legs to “push” yourself up. If you feel dizzy as you stand, hold onto something stable, wait 10 seconds, and then continue.
Who It’s For, How Often to Practice, and What to Do Tomorrow
This movement suits three groups best. Office workers who sit for eight hours or more a day and feel their lower backs stiffen up will notice the relief most clearly. Older adults benefit because the movement is gentle and involves no jumping, so it places little impact on the joints. And people whose waists often feel tight — without any diagnosed structural problem — will find it a good daily maintenance habit.
Practice once or twice a day, after waking or before bed, for 4 to 6 repetitions — about 3 to 5 minutes each time. If you’re just starting, begin with once a day and 3 repetitions, then build up to 4 to 6 after two weeks. Baduanjin rewards steady accumulation: five minutes a day for three months beats one intense session a week. You can practice this movement on its own, or as part of the full eight-movement set, which takes about 15 to 20 minutes. As the seventh movement, it comes in the second half of the routine, when your body is already warmed up and your forward fold will feel easier than it does cold.
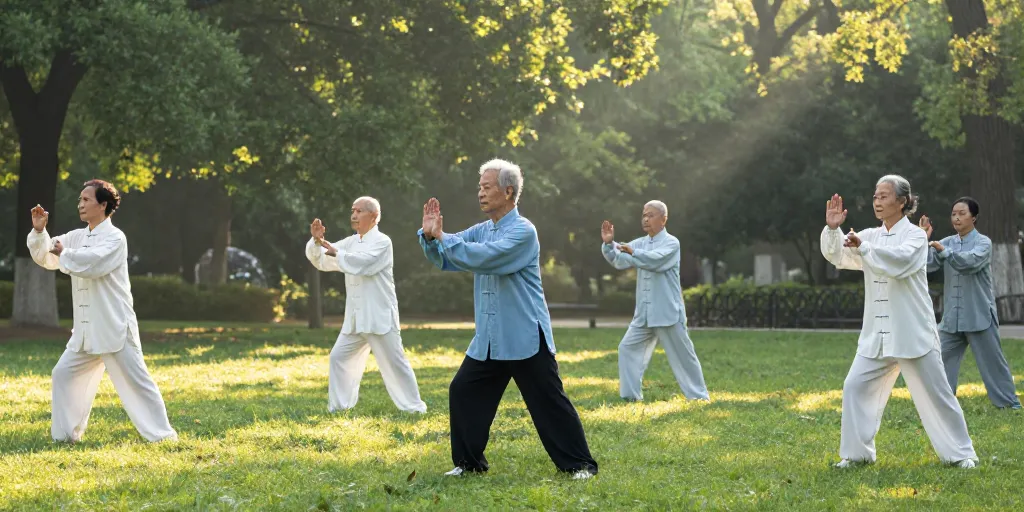
In the end, “Two Hands Reach the Feet” is not a test of flexibility. It’s a test of your ability to relax. Keep a little bend in your knees, a little softness in your waist, a little reserve in your breath, and a little room in your range — those four “little bits of slack” are the whole secret. Five minutes a day, 4 to 6 folds, and in three months your waist will give you the answer.
Here’s the simplest possible action plan: tomorrow morning, after you get up, stand tall and take two deep breaths, then do 3 repetitions following the sequence — set up, fold, reach, return. If you can’t touch your toes, it doesn’t matter. Hands on your shins, breathing smooth: that is a perfectly good practice. Keep it up for a week, and note how your waist feels afterward. If it feels looser, you’re doing it right.
Quick Answers
How far should I bend? Only as far as you can go while breathing smoothly and keeping your waist soft. Mid-shin is a perfectly good depth. The test is how your waist feels afterward — loose and warm, not sore and stiff.
Why do my knees need to stay slightly bent? A 5-to-10-degree bend protects the knee joint and keeps the stretch in the hamstrings and lower back, where it belongs. Locked knees shift the load into the backs of the knees.
What if I can’t reach my feet? Hold your shins or ankles instead. Range improves gradually over weeks and months — many regular practitioners find their hands reach their feet after about three months without forcing it.
Should I breathe in or out as I fold? Exhale as you fold forward, inhale as you rise. Never hold your breath at the bottom; if you catch yourself holding it, shrink the range until the breath flows again.
How often should I do it? Once or twice a day, 4 to 6 repetitions, about 3 to 5 minutes. Start with 3 repetitions once a day if you’re new, and build up after two weeks.
Can I do this movement on its own? Yes. It works as a standalone 5-minute routine, or as the seventh movement of the full Baduanjin set, which takes 15 to 20 minutes.
Safety note: If you have a herniated disc, lumbar spondylolisthesis, knee arthritis, or are recovering from knee surgery, please consult a doctor before practicing, and practice under professional guidance, within your limits. If you feel sharp pain in your lower back, numbness in your legs, dizziness, or blurred vision during practice, stop immediately, steady yourself, and seek medical attention if needed. Keep the range comfortable — never force yourself to reach your toes. This article is a cultural introduction to a traditional exercise; it is not medical advice and promises no therapeutic effect.