Picture this: you are halfway through your Tai Chi form in the park. You have just finished Part the Wild Horse’s Mane, and the next movement asks you to spin around almost 180 degrees and sweep one leg up in a wide arc — all without wobbling. Your body turns, but your leg refuses to follow. You land hard, your knee twists, and the whole flow falls apart. If that sounds familiar, you are not alone. Most people get stuck at exactly this moment.
The movement is called Turn Body and Lotus Kick (Zhuanshen Bailian in Chinese — zhuanshen means “turning the body,” and bailian, “swinging lotus,” describes the leg sweeping in a petal-shaped arc). When it works, the turn, the kick, and the landing feel like one smooth motion. When it doesn’t, the knees and lower back pay the price. The good news: the fix is rarely about leg strength. It is about the half-second when you shift your weight. Get that right, and the leg practically lifts itself.
Where This Movement Fits — and How Its Power Works
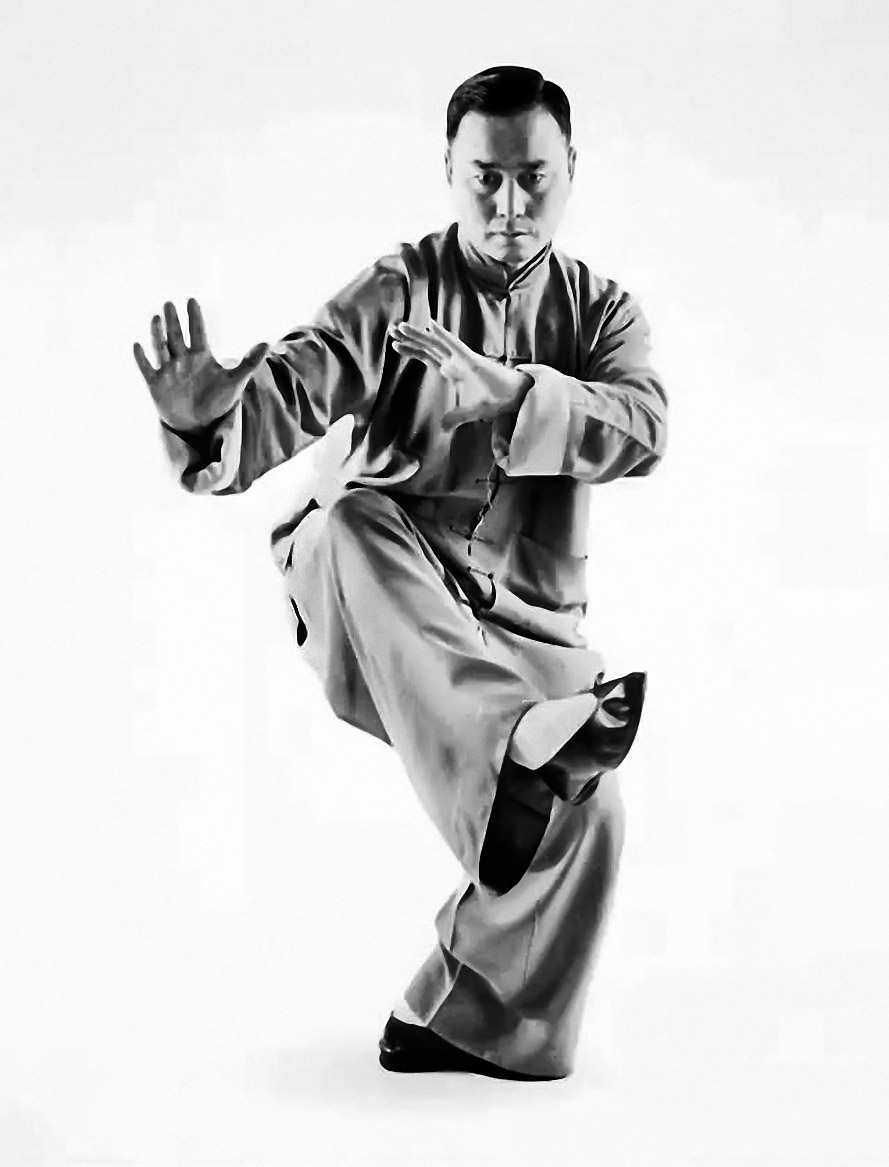
In most Tai Chi forms, Turn Body and Lotus Kick follows a forward-facing movement such as Part the Wild Horse’s Mane or Brush Knee and Push. At the end of the previous move, your weight is usually on your right leg and your body faces diagonally forward. Your task is to turn about 180 degrees in place while your right leg sweeps up toward the left front, the top of the foot tracing an arc from left to right — like a lotus petal brushing through the air — before stepping down steadily.
Memorize this power sequence: feet turn, waist leads, hands follow, leg swings last. The turning force comes from the supporting foot pivoting on the ground and the waist and hips rotating — not from throwing your shoulders around. Once the waist and hips have turned far enough, the swinging leg is simply carried up by the rotation, and your torso stays upright instead of leaning forward.
How high should the kick go? Not as high as you think. Swinging the foot to somewhere between mid-shin and knee height is plenty. Beginners should aim for 10 to 15 centimeters below the knee first — stability before height, always.
The Movement in Four Steps
Break it down into four steps. Pause 2 to 3 seconds at each one to check your alignment, and only link them together once each step feels solid.
Step 1: Close the Foot, Turn, and Shift Your Weight First
Starting from the end of the previous movement, your weight is on your right leg and your left foot rests lightly on the ground. Turn your left foot inward (toes pivoting toward the right) by about 90 degrees, so the toes point toward your right rear. At the same time, pivot on your right heel, letting the ball of the right foot grind across the floor to the right. This drives your right hip, then your waist, then your chest around to the right, in that order.
During this phase, bring both hands together in front of your chest, palms facing each other, as if you were holding a ball about 30 centimeters across.
Check yourself: throughout the turn, your right knee should always point in the same direction as your right toes — never let it collapse inward. Imagine a thread gently pulling the crown of your head upward, tuck your chin slightly, and keep your eyes looking toward the direction of the turn.
Step 2: Open the Arms and Draw the Lotus Arc
When your body has turned about 180 degrees, open both hands outward from your chest: the left hand traces an arc up and to the left, the right hand arcs down and to the right, so your arms form one wide, relaxed curve. This is not decoration — it clears space for the kick. With the right hand pressing down and the left hand leading upward, your chest opens and your waist and hips gain room to rotate.
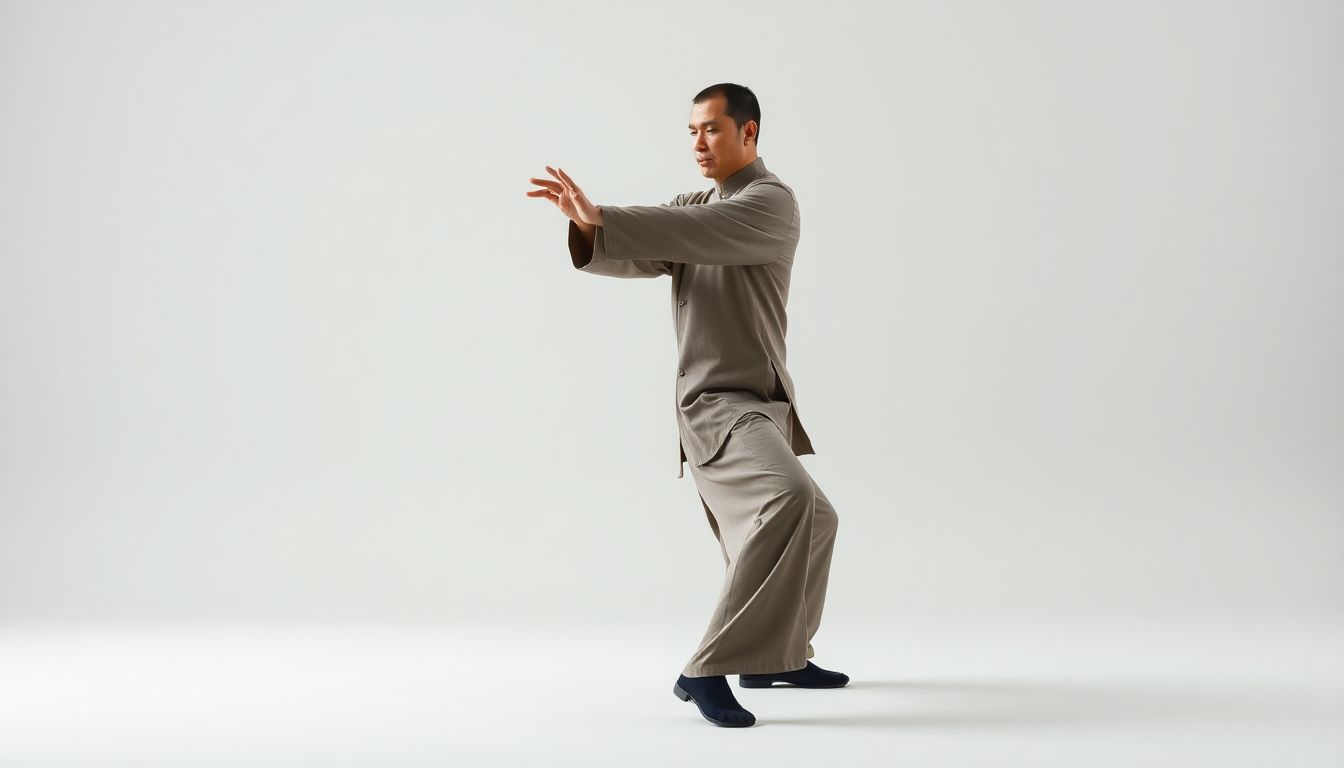
Hand shapes: let your fingers extend naturally — neither stiffly straight nor limply drooping. Turn your palms toward the front of your body at a slight angle, as if your hands were resting lightly on the surface of an invisible balloon. Keep a slight bend in your elbows. Fully straight arms push your shoulders up and make the whole upper body look rigid.
Step 3: Swing the Right Leg, Foot Tracing an Arc
Once your weight has fully shifted onto your left leg, lift your right leg off the ground. Keep the top of the foot flat and sweep it in an arc from the left side of your body toward the right front. Bend the knee slightly — never lock it — and turn the toes slightly inward, so the foot sweeps sideways like the edge of a fan. At the highest point, the top of your right foot should be roughly level with your left knee. Pause for half a second, then prepare to step down.
Breathing: inhale as you turn, letting your chest open as your arms separate; exhale slowly as the leg swings, sinking your breath down to your lower abdomen and gently engaging your core. Done right, your body feels grounded during the kick, not floaty. Done backwards — inhaling and holding your breath while you swing — your shoulders shoot up immediately and the leg won’t rise.
Step 4: Land Softly and Finish Without a Pause
As your right foot comes down, let the ball of the foot touch first, then roll onto the full sole, toes pointing about 45 degrees toward your left front. At the moment of landing, your weight transfers from the left leg to the right — keep the shift small, no more than one foot’s width. Once down, bend both knees slightly and sink your body 3 to 5 centimeters, as if sitting on the edge of an invisible chair.
The most common landing mistake is slamming the heel down and letting your body surge forward. Fix it with one word in your head: place. Let the sole of the foot glide along the ground before it settles, so you hear no clear thud when it lands. Once you are comfortable, drop the pauses between the four steps and let the turn, the kick, and the landing flow into one continuous motion.
Three Details That Make or Break the Movement
The difference between a Lotus Kick that feels comfortable and one that feels awkward lives in three small details.
The hand-leg rhythm: the hands move half a beat ahead of the leg. As your arms open into their arc, the right foot is only just leaving the ground; when your arms reach the top of the arc, the right leg is at its highest point. If hands and feet start at exactly the same moment, the movement looks rushed. If the hands lag, it looks sluggish. Practice the arm arc three times on its own, then add the leg — the rhythm will click into place.
The supporting foot: through the entire turn and kick, the supporting foot must stay in contact with the floor, pivoting on the sole. Never lift the heel. The moment the heel rises, your center of gravity floats upward and your body sways side to side during the kick. Practice in thin-soled cloth shoes or Tai Chi shoes — you can feel the floor clearly through them. Thick-soled trainers muffle that feedback, so they are not ideal while you are still learning.
Where your eyes go: let your gaze follow the turn. Look toward your right rear as you turn, shift your eyes to the direction of the swinging foot as the leg rises, and return your gaze to the front once you have landed. When the eyes settle, the head and neck stop wobbling — and your balance improves noticeably.
Five Common Mistakes and How to Fix Them
Mistake 1: Whipping the leg with your waist, like kicking a shuttlecock. Your torso rocks back and forth, the leg goes high, but you can’t stand steady on landing. Fix: drop the kick below knee height and practice the turn with a small swing first. Ten low swings a day beat three high ones.
Mistake 2: Letting the knee collapse inward during the turn. The supporting knee caves in and the inside of the knee feels sore afterward. Fix: before you turn, think “knee finds toes” — keep the knee tracking the direction of the toes the whole way around. Try holding a thin sheet of paper between your knees: if it doesn’t fall during the turn, your knees haven’t collapsed.
Mistake 3: Leaning backward while kicking. To get the leg higher, you arch your lower back. Fix: imagine the thread pulling the crown of your head upward and keep your chest slightly tucked in, your waist upright. A lower kick is always better than height bought with a backward lean.
Mistake 4: Stiff hands, as if carrying a tray. Your shoulders hunch as your arms open and your elbows lock, leaving the whole upper body tense. Fix: before you practice, spend 30 seconds sinking your shoulders: let both arms hang naturally, drop your shoulders down, and feel your shoulder blades draw toward your lower back. Then do the arm movement — your shoulders will stay loose.
Mistake 5: Landing too heavily, heel slamming the floor. You hear a “thud” and your body surges forward. Fix: change the landing to ball-of-foot first, gliding along the ground before the sole settles, then immediately check that your weight sits between your feet, slightly toward the supporting side. Practice on a wooden floor: the quieter your footsteps, the better — you have it when you can barely hear the landing.
Summary and Practice Plan
Turn Body and Lotus Kick is really a lesson in shifting your weight while turning — not a contest for how high you can lift your leg. Remember the four steps: close the foot and turn, open the arms, swing the leg in an arc, place the foot down softly. And guard three lines: knees track the toes, the waist and hips lead the hands and feet, and the breath moves with the turn. Height comes after stability; speed comes after softness.
Practice plan: spend 10 to 15 minutes a day on this single movement. Use the first 5 minutes for the broken-down steps, pausing 2 seconds at each one to check your alignment; use the remaining 10 minutes for 8 to 10 continuous repetitions. After two weeks, film yourself from the side — in a mirror or with a friend’s help — and check each of the five mistakes above one by one. Fix one before adding difficulty.
Quick Answers
How high should the Lotus Kick go? Mid-shin to knee height is enough. Beginners should start 10 to 15 centimeters below the knee and only raise the kick once the weight shift is smooth.
Why does my leg refuse to lift after I turn? Because your weight never fully moved onto the supporting leg. The kick is powered by the pivot of the supporting foot and the rotation of the waist and hips — finish the turn first, and the leg will follow.
What should I do if my knee aches after practice? Stop, check that the knee tracks the toes throughout the turn, and lower the kick. If pain persists, rest and consult a doctor — pushing through knee pain is never worth it.
Can I practice this on a slippery floor? No. The supporting foot must pivot on the sole without sliding. Use a wooden floor, a mat, or flat outdoor ground with good grip.
How long until the movement feels smooth? Most people feel the turn-and-kick connect after about two weeks of daily 10-minute practice. The full, pause-free flow usually takes four to six weeks.
Safety note: if you have a previous knee injury, lower back discomfort, or weak balance, keep the kick below knee height and start with a turn of around 120 degrees rather than the full 180, building up gradually — never force it. Warm up for 5 to 10 minutes before practicing, loosening your knees, ankles, and waist and hips. Stop immediately and rest if your knees or lower back hurt during practice, and consult a doctor if pain continues. Tai Chi is a gentle form of exercise; it makes no promise of any therapeutic effect. Practice within your limits and progress step by step — that is the real way to train.