It is 6:30 in the morning. Old Chen has practiced for three years, and as he flows from “Fair Lady Works the Shuttles” into “Needle at Sea Bottom,” his right hand dives down — and his knee lets out a small crack. The move looks simple: sink down, reach one hand toward the ground. Yet after three years, that single downward reach still feels wrong.
If your back rounds, your knee creeps forward, or your balance wobbles just as your hand drops, you are not alone. Needle at Sea Bottom is one of the most misunderstood movements in the 24-form set: done well, it teaches you to sink your weight without collapsing your posture; done badly, it punishes your knees and lower back.
What Needle at Sea Bottom Is: A Sinking Movement in the 24-Form Set
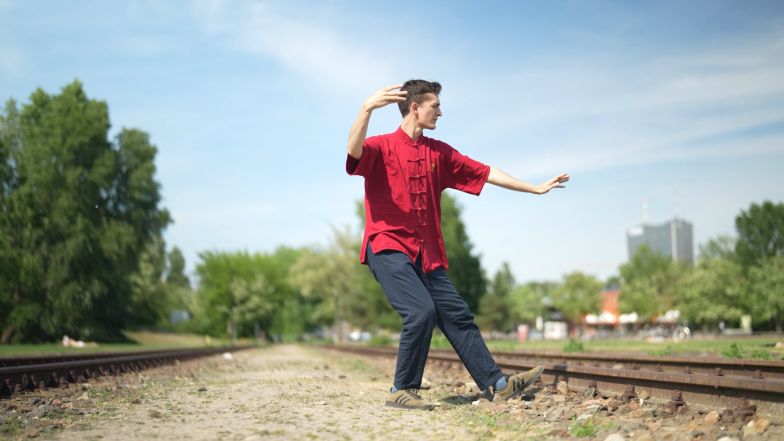
Needle at Sea Bottom is the 19th form of the simplified 24-form Tai Chi set, coming right after Fair Lady Works the Shuttles and just before Flash Through Arms. The name paints the picture: your right hand is a needle driving straight down at an angle into the seabed, and your whole body sinks with it.
From the outside it is a low squat on an empty stance: left toes touching the ground with the heel raised, right leg carrying your weight, right hand driving downward, left hand pressing beside the hip. The most common beginner mistake is turning it into “bend over and grab the floor” — the waist collapses, the hand reaches for the ground, and the knees and lower back pay for it. Remember one rule: it is your center of gravity that sinks, not your upper body. Your torso stays upright, your spine stands like a bamboo pole, and the legs and hips do the work.
The transition from Fair Lady Works the Shuttles is the key. Before you enter Needle at Sea Bottom, your weight must already be on your right leg: the left foot steps half a pace forward into an empty stance while the right hand drives down from the chest and the left hand presses beside the hip. There is no pause between the two — they flow like water around a stone. If your form stutters here, the cause is usually the previous movement: you finished it too completely and your weight never shifted in time.
Step by Step: Four Beats to Complete the Movement
Break the movement into four beats. Each beat solves one problem — practice them separately first, then link them together.
Beat 1: Step the Left Foot Forward into an Empty Stance
Put all your weight on your right leg, knee slightly bent. Step your left foot lightly forward, about two-thirds of a foot length, toes touching the ground, heel raised about two finger-widths off the floor. The left leg carries no weight; the knee stays slightly bent and relaxed, light as a dragonfly touching water. Quick check: lift the left foot slightly once the toes are down — if your body does not wobble, your weight is all on the right leg.
Beat 2: Sink Down on the Right Leg
Once the left foot is set, slowly bend the right leg and squat, sitting your hips backward and downward as if lowering yourself onto a stool you cannot see. Sink only as far as your knees allow: the right knee must not pass the toes, and it must point the same way. Inhale as you sink, feeling the breath settle into your lower abdomen like a plumb weight dropping.
Beat 3: Drive the Right Hand Down, Press with the Left
As you sink, your right hand drives from your chest down and to the right at an angle, palm facing down and to the left, fingers extended and together, fingertips pointing at the ground about 30 centimeters outside your right foot. Keep the elbow slightly bent — never straighten the arm completely. At the same time, your left hand presses down and to the left from your chest, palm down, about a hand’s width beside your left hip, fingers pointing forward.
Beat 4: Hold the Posture for Three Seconds, Eyes on the Right Hand
Once you arrive, look toward your right fingertips and hold three seconds. Scan your body: crown lifted by an invisible thread, tailbone tucked slightly inward, shoulders relaxed and sunk, breathing natural. Holding the posture is not freezing — it is like pressing down on a spring, storing energy for the next movement, Flash Through Arms. To rise, lift the right hand first, then straighten the right leg and draw the left foot back — never in a sudden jerk.
Footwork: The Empty Stance Is the Root of the Movement
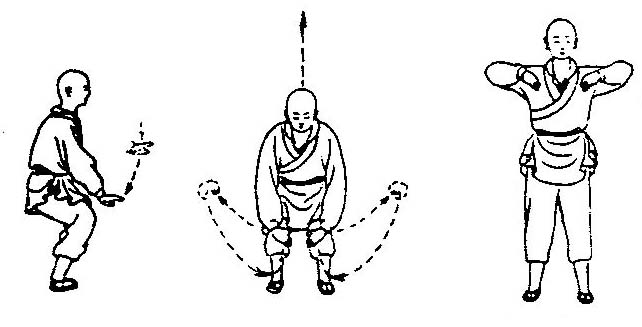
The footwork can be summed up in one line: right leg solid, left leg empty, toes touching the ground. The right leg carries almost all of your weight; the left foot only touches lightly, for balance and direction.
Where the left foot lands matters too: the toes touch down in front of the right foot, about 30 degrees to the left, roughly one and a half foot lengths away. Step too close and your weight crowds together, leaving no room to sink; step too far and your body pitches forward, forcing the right knee past the toes. Test it: draw a line on the ground, place your right foot on it, and touch your left toes just left of the line — one fist should fit between them.
As you sink, keep the whole sole of your right foot on the ground, toes gripping gently, heel down. Many people find their heel popping up halfway through the squat, shifting all the weight onto the ball of the foot and doubling the pressure on the knee. Focus on the Yongquan point in the center of your right sole, imagine roots growing into the ground, and your knee will stop wobbling.
Hand Shapes and Breathing: The Right Hand Is the Needle, the Left Hand Is the Press
The right hand takes the shape called an “inserting palm”: five fingers extended and together, thumb pressed against the side of the index finger, palm facing down and to the left, power concentrated along the line of the index and middle fingers. The hand travels a diagonal line from the chest down toward the ground outside the right foot — not smashing straight down, not pushing flat forward.
The left hand takes the shape of a “pressing palm”: palm facing down, fingers naturally separated and slightly curved, as if resting on a tabletop, pressing about a hand’s width outside the left hip, level with the hip. The most common mistake is pressing too low, letting it drop to the outside of the thigh and dragging the shoulder down with it.
The two hands look like they are doing separate jobs, but they are one pair of opposing forces: the right hand drives down and outward, the left hand presses down and outward, and the two pulls stretch the spine straight.
The breathing rule is just two lines: inhale as you sink, exhale as you hold. As the left foot steps out and the right leg sinks, breathe in slowly through the nose and let the breath settle into your lower abdomen; hold the posture for three seconds and breathe out gently through the mouth, letting the shoulders and chest relax and sink. Beginners almost always hold their breath — the moment the movement gets complicated, the breathing stops. The fix is to slow down: take a full 8 seconds for the four beats, one even breath per beat, and the breathing will catch up.
Common Mistakes: Five Corrections That Work Better Than Ten Extra Reps
The movement goes wrong in five places. Fix them against this checklist — it beats blindly repeating the form ten more times.
- Bending over to reach the ground. The upper body leans forward more than 15 degrees, the hand grabs for the floor, and the waist folds like a snapped branch. Fix: put your hand back at your chest and practice only the squat; once you feel your weight sinking, add the hand back in.
- Knee passing the toes. The right knee drives past the toes as you sink, caves inward, and feels sore afterward. Fix: sit your hips backward first, as if lowering yourself onto a chair behind you, and the knee retreats. Keep it pointing the same way as the toes — never caving in, never flaring out.
- Planting the left foot flat. The whole left sole lands and takes weight, turning the empty stance into a bow stance. Fix: keep the left heel off the ground after the toes touch, and practice standing in an empty stance for one minute a day until the feeling is clear.
- Straightening the right arm too much. The right arm locks straight, the elbow joint locks, and the power dies at the elbow. Fix: keep the elbow bent at roughly 150 degrees, as if holding an invisible ball. The insertion is right when the right shoulder is relaxed, the elbow tip points down, and the fingers feel a penetrating force going down.
- Breaking the flow before and after. You pause and catch your breath between movements, and the form breaks into two pieces. Fix: hand your weight to the right leg before you enter the movement, and let the right hand begin its downward drive the moment the left foot steps out. Practice the two movements together slowly, 20 times a day, and within three days they will connect.
Your 4-Week Practice Plan
In three lines: the empty stance — right leg solid, left leg empty — is the root; the opposing pull of the right hand inserting and the left hand pressing is the power; sinking your weight instead of bending your waist is the soul.
Week 1: only the empty-stance squat, 10 times a day, focusing on the feeling under your feet. Week 2: add the two hands — insert and press — 15 times a day. Week 3: link it with Flash Through Arms, 20 times a day. Week 4: put it back into the full 24-form set and walk through the whole routine three times, checking the movements before and after it connect smoothly. Ten to fifteen minutes a day is enough.
Practice in the early morning on flat ground, in thin, flat-soled cloth shoes. After practice, do not sit down right away — walk a couple of laps and loosen your knees and ankles. Practice for a month, then look back at that awkward downward reach from day one: your body will already remember the correct shape.
Quick Answers
Which form is Needle at Sea Bottom in the 24-form set? It is the 19th form, coming right after Fair Lady Works the Shuttles and just before Flash Through Arms.
What is the single most important thing to get right? Sink your weight, not your upper body. Your torso stays upright and your spine stays tall; the legs and hips do the sinking.
Why do my knees hurt when I practice it? Usually one of two reasons: the right knee passing the toes, or the left foot planted flat and taking weight. Sit your hips backward first, keep the knee behind the toes, and keep the left heel raised.
How should I breathe? Inhale as you sink down, exhale as you hold the posture for three seconds. If you catch yourself holding your breath, slow the movement to 8 seconds — the breathing will follow.
Safety note: Practice gradually and within your own limits. If you have an old knee injury or meniscus or kneecap discomfort, keep the squat shallow and stop immediately if you feel pain — consult a doctor if needed. If you have high blood pressure or a tendency to feel dizzy, rise slowly and avoid standing up suddenly. This article shares traditional fitness culture and is not medical advice; it promises no therapeutic results.