Three months into the 24-Form Tai Chi, and a lot of people get stuck on the same move: Play the Pipa. The hands look right, but the feet fall apart. The feet finally settle, and the hands look like they are strumming thin air. It looks light and easy, yet this single posture exposes more about your footwork, hand shape, and weight shifting than almost anything else in the first half of the form.
That is exactly why it is worth a week of focused practice. Play the Pipa appears only once in the 24-Form, but it is a checkpoint. If your bow stance is wrong here, the next move, Repulse Monkey, will feel unsteady under your feet. If your hands lose their shape, the power in the following Brush Knee and Push will not connect. Do not rush past it as a transition. Slow down, take it apart, and put it back together properly.
What This Move Is Actually Doing
Play the Pipa follows White Crane Spreads Its Wings. At the end of White Crane, your weight sits on your right leg, with your left foot lightly touching the ground in an empty stance — in Tai Chi, an “empty stance” means the foot rests on the floor but carries almost no weight. From there you step forward with your left foot into a left bow stance, and both hands push forward and slightly to the left from your chest, right hand above, left hand below, as if you were holding a pipa upright against your body.
The pipa is a traditional Chinese lute, pear-shaped, held vertically. You are not miming a performance. You are borrowing its shape: one hand high, one hand low, arms rounded, as if cradling something precious and fragile. The whole move takes about a beat and a half. Too slow, and it drags. Too fast, and it falls apart.
Picture a concrete scene. You are standing in your living room, a coffee table about a metre in front of you. Step forward with your left foot — roughly one and a half foot-lengths — heel first, toes lightly touching the floor beside the table leg. Push both hands forward as if you were steadily carrying a bowl of water to the edge of the table. Stop when your hands reach the edge. Wrists stay level, elbows keep a slight bend. Nothing is forced, nothing collapses.
That image does most of the teaching. The hands do not shove. They deliver. The feet do not lunge. They arrive. And the waist, not the arms, decides when everything happens.
Footwork: Switching Between Bow Stance and Empty Stance
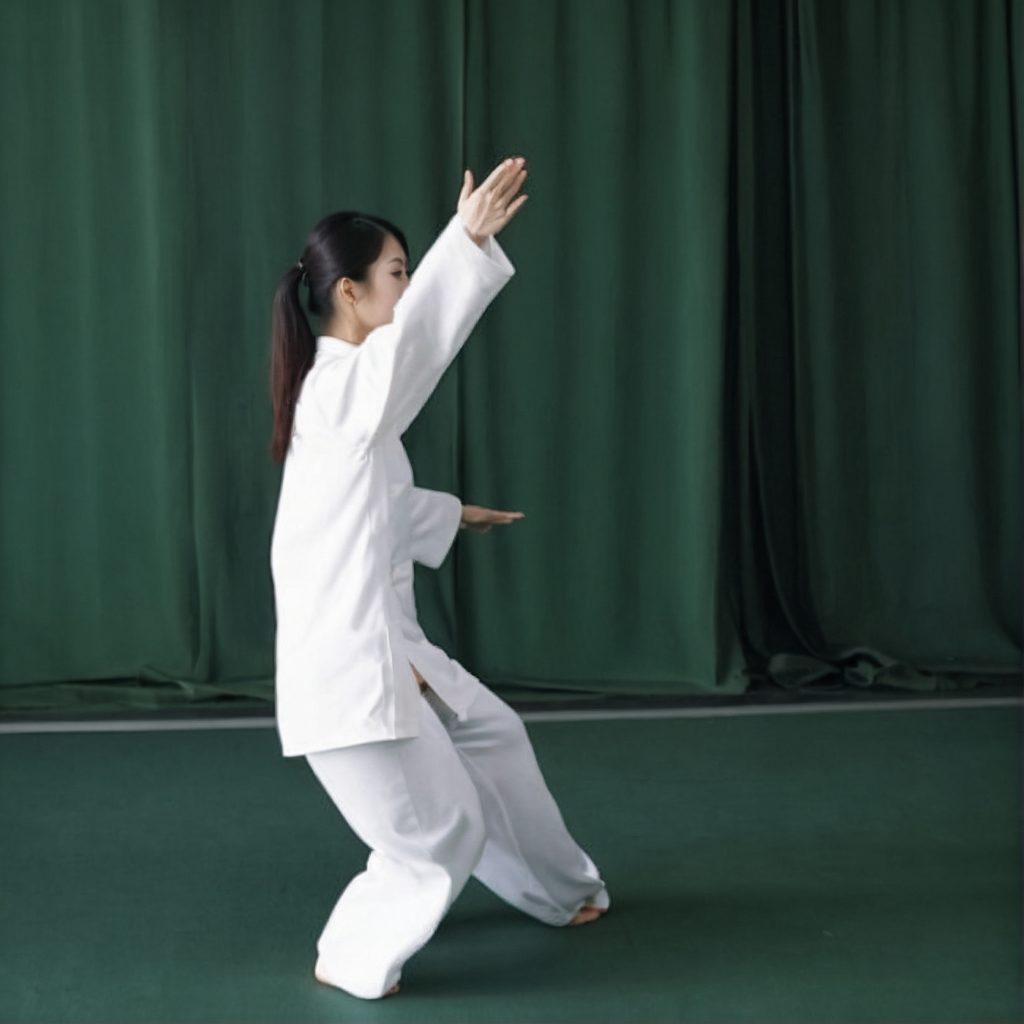
Footwork is the skeleton of this move. At the start, all your weight is on your right leg. Your left foot is in an empty stance, toes lightly touching the ground, heel slightly raised, carrying less than ten percent of your weight. As you turn, the left foot does not lift high and step forward. Instead, the toes skim along the floor, sliding forward half a step. The heel lands first, then the whole sole settles. That sliding word matters: lift the foot too high, and your balance wobbles; drag it along the ground, and your centre of gravity stays low and steady.
When the step lands, you arrive in a left bow stance. Your left knee pushes forward, tracking directly over your left toes, in the same direction, and not passing beyond the toes. Your right leg stretches behind you, heel pressed firmly into the floor, toes turned out about 45 degrees, like a diagonal pillar bracing you from behind. The distance between your feet depends on your height. For someone around 1.70 metres tall, front and back feet sit roughly 60 to 70 centimetres apart. Too narrow, and you cannot stand steadily. Too wide, and your weight cannot sink down.
There is a simple test for whether your footwork is right. Once you reach the final posture, hold still for three seconds and let go with your hands. Your body should not sway. You should be able to lift your left toes gently without falling, while your right heel stays on the ground. If your left knee collapses inward, or your right heel lifts, your weight is still stuck between your feet instead of being delivered onto your left leg.
Practice the step alone, 20 times a day: left foot skims forward, lands, settles into the bow stance, three beats, then returns. Within a few days the sequence will feel smooth.
One detail is easy to miss: when you turn, the waist turns first, and the foot follows. Many beginners step out with the foot while the waist stays behind, leaving the upper body twisted and the bow stance crooked. The correct order is to turn your waist about 30 degrees to the left, which moves your left hip and left leg, and only then does the left foot follow. The waist turns as far as the foot travels. The body stays one connected whole.
Hand Shape: How to Hold the Pipa
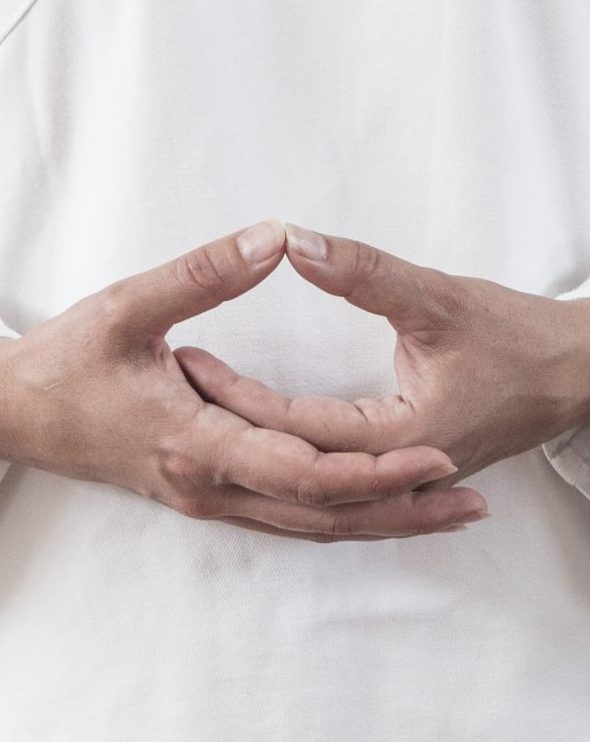
The name of the move is hidden in the hands. Your right hand sits above, palm facing down and to the left, fingers naturally spread and slightly curved, as if resting on the upper strings of the pipa. Your left hand sits below, palm facing up and to the right, supporting from under the inside of your right elbow, as if holding the bottom of the instrument. Leave a fist-sized gap between the two hands, about 8 to 10 centimetres, so it feels as though you are holding an invisible circle against your chest.
The most common fault is pressing the hands too close together. The arms clamp against the chest, the shoulders rise, and the whole body curls inward. After you reach the posture, check three points: your right elbow sinks down instead of lifting up; your left elbow stays a fist away from your body instead of pressing against your ribs; both shoulders relax, sitting noticeably lower than your ears.
Height matters too. Your right hand should be level with your chest, your left hand just above your navel. Neither hand rises above your chin, and neither drops below your waist. If the hands drift too high, the shoulders tense. If they sink too low, the round shape collapses.
Your wrists decide whether the posture looks right. Keep them level — do not bend them backward, and do not let them droop. Imagine a coin balanced on each wrist: as you push forward, the coin must not fall off. Your fingers do not need to be deliberately straight. Let them relax and extend naturally. Stiff, straight fingers make the arms rigid, and the power never reaches the fingertips.
Breathing and the Path of Power
The breathing in this move is one in, one out. As White Crane closes, you breathe in and sink slightly. As you step into Play the Pipa, you breathe out while your left foot lands and both hands push forward. The exhale should be even, starting with the step and finishing exactly as you arrive in the posture. The breath is long and continuous — no holding, no gasping. People who hold their breath always have raised shoulders. People who gasp always rush their steps.
The path of power — what Tai Chi calls jin, the coordinated force that travels through the body rather than from the arm alone — starts at your right heel, travels up the right leg, through the waist and left hip, into the left foot, and then from the waist out to both hands. It sounds abstract, so focus on one sensation while you practise: can the push from your right heel reach your left palm?
Press your right heel into the floor. Let the force travel up the leg. Turn the waist, and the hands push out. Hands, feet, and waist arrive at the same moment, with no pause in between. That simultaneous arrival is the test of whole-body power. A beat early is rushing. A beat late is falling apart.
Slow the breath down. Slow the step down. Take four to five seconds for a single move, and feel your weight travel from your right leg to your left leg. Speed will come later, on its own. For now, clarity matters more.
Five Common Mistakes — and How to Fix Them
Almost every beginner makes one or two of these five mistakes in Play the Pipa. Working through them one at a time is far more effective than repeating the move blindly ten times.
- Sagging lower back in the bow stance: As the left knee pushes forward, the lower back arches and the hips stick out. Fix it by tucking your tailbone slightly inward as you arrive, as if sitting on a tall stool. Keep your spine upright and imagine a thread gently lifting the crown of your head.
- Right heel lifting off the ground: All the weight falls onto the left leg, the right heel rises, and the body pitches forward. Fix it by keeping your right heel pressed down at all times. The back leg stays straight but the knee is not locked — the back foot is a brake, not a decoration.
- Pushing the hands too far: The hands reach more than 40 centimetres in front of the body, elbows straight, shoulders reaching forward. Fix it by stopping when your hands are about a fist and a half in front of your chest. Keep a bend in the elbows and hold the power in the hands instead of spending it all.
- Left foot turned out too far: On landing, the toes point outward more than 30 degrees, so the knee and toes point in different directions and the knee twists. Fix it by pointing your toes straight ahead before the heel lands, then making only a small adjustment after the heel touches down. The knee follows the toes.
- Turning the waist without the hips: The waist turns, but the hips stay behind, twisting the upper and lower body like a rope. Fix it by imagining your hips as a door: waist and hips turn together about 30 degrees, and the left foot simply follows the door.
There is a simple, unglamorous way to correct these: fix one mistake per day. Today, watch only your right heel. Tomorrow, watch only your hand position. Five days, five fixes. Trying to fix all five at once overloads your attention, and you will finish the session exactly as you started. Fix one, remember it, then move to the next.
A Two-Week Practice Plan
Play the Pipa rewards three things: a steady step as the left foot skims and lands, a rounded hand shape that holds the pipa, and a waist that brings hands and feet together at the same moment. Get the footwork right, and your balance steadies. Get the hands right, and the power flows. Get the breathing right, and the move gains rhythm. There is no shortcut — just 15 minutes of single-posture repetition each day.
Set yourself a small two-week plan. Every morning before your full form, practise Play the Pipa alone, 20 times. For the first 10 reps, go slowly: pause for two seconds after the step and two seconds after arriving in the posture, and check your alignment. For the next 10 reps, move continuously, matching the breath, in one smooth flow. After two weeks, put it back into the full 24-Form and walk through it. You will notice that the whole stretch from White Crane Spreads Its Wings to Repulse Monkey suddenly feels connected.
That is the quiet payoff of single-posture practice. One move, done carefully, repairs the joints on either side of it.
Quick Answers
Why does my balance wobble when I step forward? You are probably lifting the foot too high or stepping before the waist turns. Skim the toes along the floor, turn the waist first, and let the foot follow. Keep the step to about one and a half foot-lengths.
How far apart should my hands be? About a fist apart, roughly 8 to 10 centimetres, with the right hand at chest height and the left hand just above the navel. If your shoulders rise or your elbows clamp to your ribs, the hands are too close together.
Should my left knee go past my toes? No. The knee tracks over the toes in the same direction and does not pass beyond them. If the knee drifts inward or the heel lifts, your weight has not fully transferred to the front leg.
How long should one repetition take? Four to five seconds when you are learning, including the breath. Speed is not the goal. Simultaneous arrival — hands, feet, and waist together — is the goal.
Can I practise this move on its own? Yes, and you should. Twenty slow repetitions a day for two weeks is enough to change how the whole first half of the form feels. Single-posture practice is how most experienced practitioners fix a move that keeps going wrong in the full sequence.
Practice gradually and within your limits. Keep your bow stance at a comfortable depth and do not force your knee past your toes. If you have knee or back issues, reduce the range of motion, move more slowly, or pause and consult a qualified teacher or healthcare professional before continuing. This article is cultural and educational guidance for practice, not medical advice, and it makes no promise of any therapeutic effect.