目前gpt本质上是续写,所以在待测函数函数定义清晰的情况下,单元测试可以适当依赖它进行生成。
收益是什么:
辅助生成测试用例&测试代码,降低单元测试编写的心智成本辅助code review,帮助发现代码显式/潜在问题
本文测试环境:
gpt: gpt-3.5-turbogo:go 1.17
本文实践场景:企业微信美图鉴赏机器人
生成单元测试的工作流如下:
选定你的待测函数分析函数的依赖:结构体定义、repo依赖、repo interface抽象(用fx和wire框架依赖注入的话会方便很多)组织prompt,准备施法吟唱魔法,得到输出单元测试代码copy到ide里面缝缝补补,与预期出入太多的话,调整prompt重来/要求gpt按照某个标准重写(比如:请按照testCases的写法重写组织测试数据)运行测试用例
话不多说,先上基础prompt:
写下列写下列代码中[待测函数名]函数的单测,要求覆盖全部逻辑。
断言使用require包。
测试用例以testCases的形式输出。
下面的部分,我按照工作流的繁杂程度,简单区分了下easy/normal/hard情况。
单个函数,并且外部依赖都是开源库,那么直接把代码贴上去就行。
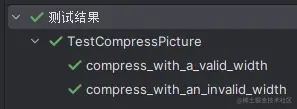
这里我们用图片压缩的独立函数举例: (prompt前摇咒语 + 代码片段)
断言使用require包。
测试用例以testCases的形式输出。
// CompressPicture the picture by resizing it to the specified width.
func CompressPicture(picData []byte, width uint) ([]byte, error) {
// Decode the input image.
oldBuffer :=bytes.NewBuffer(picData)
inputImg, _, err :=image.Decode(oldBuffer)
if err !=nil {
return nil, err
}
// Resize the image to the specified width.
outputImg :=resize.Resize(width, 0, inputImg, resize.Lanczos3)
// Encode the output image as PNG and write it to a buffer.
newBuffer :=new(bytes.Buffer)
err=png.Encode(newBuffer, outputImg)
if err !=nil {
return nil, err
}
// Return the compressed image as a byte slice.
return newBuffer.Bytes(), nil
}
ChatGPT输出的代码块如下:
// Setup test data
imgData, err :=os.ReadFile(“test-image.png”)
if err !=nil {
t.Fatalf(“failed to read test image file: %v”, err)
}
testCases :=[]struct {
name string
width uint
}{
放到ide里,完美运行,说明简单函数的单元测试生成还是很强的~
有外部定义引入的时候,最好把外部定义直接贴上(不涉及mock)。
这里举例的函数出现了外部依赖 entity.ArchiveWithData等定义,所以最好要加上外部定义在输入中:
断言使用require包。
测试用例以testCases的形式输出。
// ConvertArchiveWithDataToBotTextMsg 将画作稿件信息转换为企微机器人文本消息
func ConvertArchiveWithDataToBotTextMsg(data *entity.ArchiveWithData) *entity.BotMsgReq {
var MentionedList []string
proxyUrl :=data.Info.Urls.Original
rawPixivUrl :=fmt.Sprintf(“https://www.pixiv.net/artworks/%d”, data.Info.Pid)
txt :=&entity.BotText{
Content: fmt.Sprintf(“proxy图源:%s\npixiv图源:%s”, proxyUrl, rawPixivUrl),
MentionedList: MentionedList,
}
postText :=&entity.BotMsgReq{
MsgType: entity.BotMsgText,
Text: txt,
}
return postText
}
一些导入的定义如下:
type BotText struct {
Content string `json:”content”`
MentionedList []string `json:”mentioned_list”`
}
type BotMsgReq struct {
MsgType BotMsgType `json:”msgtype”`
Text *BotText `json:”text,omitempty”`
}
const (
BotMsgText BotMsgType=”text”
)
type ArchiveWithData struct {
Info Archive
Data []byte
}
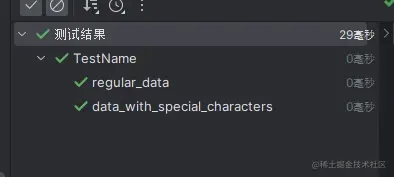
下面是生成的代码,经过少量修改后可以直接运行:(因为少输入了一个结构体的定义,导致它猜测了一些字段)
testCases :=[]struct {
name string
data *entity.ArchiveWithData
expected *entity.BotMsgReq
}{
{
name: “regular data”,
data: &entity.ArchiveWithData{
Info: entity.Archive{
Pid: 123456,
Urls: entity.PicUrl{
Original: “https://example.com/image.jpg”,
},
},
Data: []byte{},
},
expected: &entity.BotMsgReq{
MsgType: entity.BotMsgText,
Text: &entity.BotText{
Content: “proxy图源:https://example.com/image.jpg\npixiv图源:https://www.pixiv.net/artworks/123456”,
},
},
},
{
name: “data with special characters”,
data: &entity.ArchiveWithData{
Info: entity.Archive{
Pid: 789012,
Urls: entity.PicUrl{
Original: “https://example.com/image(with)special&characters.jpg”,
},
},
Data: []byte{},
},
expected: &entity.BotMsgReq{
MsgType: entity.BotMsgText,
Text: &entity.BotText{
Content: “proxy图源:https://example.com/image(with)special&characters.jpg\npixiv图源:https://www.pixiv.net/artworks/789012”,
},
},
},
}
for _, tc :=range testCases {
t.Run(tc.name, func(t *testing.T) {
result :=ConvertArchiveWithDataToBotTextMsg(tc.data)
require.Equal(t, tc.expected, result)
})
}
}
外部依赖越多,prompt template的构建可能就越复杂
ps.实际上gomonkey它也可以写
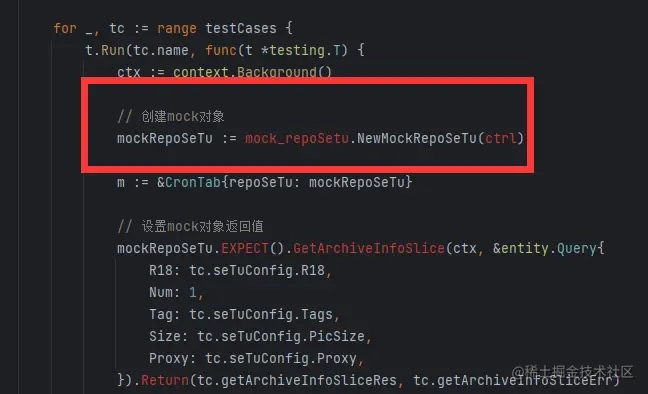
外部依赖repo的部分,要求gpt使用gomock进行对应repo的mock即可。
外部定义最好进行剪枝。
输入:
断言使用require包。
测试用例以testCases的形式输出。
对于m.repoSeTu.GetArchiveInfoSlice的调用,使用gomock进行mock处理,假设已经有mock文件。
func (m *CronTab) getSeTuDescSlice(ctx context.Context, seTuConfig config.SeTuConfig) (entity.QueryResult, error) {
queryResSlice, err :=m.repoSeTu.GetArchiveInfoSlice(ctx, &entity.Query{
R18: seTuConfig.R18,
Num: 1,
Tag: seTuConfig.Tags,
Size: seTuConfig.PicSize,
Proxy: seTuConfig.Proxy,
})
if err !=nil {
return entity.QueryResult{}, err
}
return queryResSlice, nil
}
下面是外部依赖的定义:
type SeTuConfig struct {
SetuApiUrl string `yaml:”setu_api_url”`
QWAuth []string `yaml:”qw_auth”`
CronStr string `yaml:”cron_str”`
R18 int64 `yaml:”r_18″`
Tags []string `yaml:”tags”`
PicSize []string `yaml:”pic_size”`
Proxy string `yaml:”proxy”`
}
// QueryResult 请求结果
type QueryResult struct {
Error string `json:”error”`
ArchiveSlice []Archive `json:”data”`
//picPaths []string
}
输出:
// mock_repoSetu 是通过mockgen自动生成的,用于模拟repoSetu接口的mock文件
func TestCronTab_getSeTuDescSlice(t *testing.T) {
testCases :=[]struct{
name string
seTuConfig config.SeTuConfig
getArchiveInfoSliceRes entity.QueryResult
getArchiveInfoSliceErr error
wantErr bool
}{
{
name: “success”,
seTuConfig: config.SeTuConfig{
R18: 0,
Tags: []string
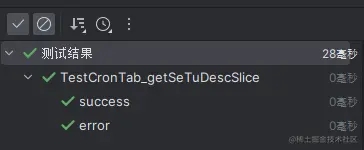
测试用例解释:
测试用例”success”模拟了getSeTuDescSlice调用成功的情况,
设置查询条件R18=0,Tags=”tag1″, “tag2″,PicSize=”large”,期望返回多条图片信息;
测试用例”error”模拟了getSeTuDescSlice调用失败的情况,
设置查询条件R18=1,Tags=”tag3″,PicSize=”small”, “medium”,期望返回错误信息。
生成的代码太长,几点总结:
gomock代码可以正常生成,但是外部repo定义最好清晰明了,可以直接把interface定义贴上去,会被认知到。粘贴到ide中,发现主要问题是包名导入问题,简单修改即可
生成的代码有一些报错:
修改引入的类型名后即可:

修改后运行成功:
如果需要生成后人工修改量更低的话,需要更精确的上下文信息(包名、函数定义、描述等)
ChatGPT单次对话有长度限制,所以一次尽量只进行一个函数的单元测试生成。需要外部 repo mock的待测函数,需要的上下文很多,并且引入的无关字段需要剪枝避免污染输入一些复杂的私有包,看起来是比较不好支持的(尝试过在prompt中教会他,但是效果不好)一些复杂逻辑和边界情况,ai可能口是心非(写的用例和表述不一致,比如经典的20%*20%=400%,但是他知道这是错的)对于分层不是很清晰的项目,对函数/repo打桩可能很困难,这个时候要描述清楚就比较困难了,gomonkey可能比较适用
写好测试方法,让gpt帮助扩充用例集code review,下面的代码就是gpt给出的代码建议
// picCompress Modify size to compress pictures.
func picCompress(picData []byte) (newPicData []byte, err error) {
oldBuf :=bytes.NewBuffer(picData)
pic, _, err :=image.Decode(oldBuf)
if err !=nil {
return
}
newPic :=resize.Resize(uint(pic.Bounds().Dx()/2), 0, pic, resize.Lanczos3)
var newBuf bytes.Buffer
err=png.Encode(&newBuf, newPic)
if err !=nil {
return
}
newPicData, err=ioutil.ReadAll(&newBuf)
if err !=nil {
return
}
return
}
减少对象的创建,避免额外的内存分配和垃圾回收。
增加错误检查,避免可能的错误被忽略。
以下是优化版代码:
// picCompress Modify size to compress pictures.
func picCompress(picData []byte) ([]byte, error) {
reader :=bytes.NewReader(picData)
pic, _, err :=image.Decode(reader)
if err !=nil {
return nil, err
}
newPic :=resize.Resize(uint(pic.Bounds().Dx()/2), 0, pic, resize.Lanczos3)
var writer bytes.Buffer
err=png.Encode(&writer, newPic)
if err !=nil {
return nil, err
}
return writer.Bytes(), nil
}
尝试减少了对象的创建,使用了 bytes.Reader 代替了 bytes.NewBuffer 和 ioutil.ReadAll。
在处理图片过程中,使用 bytes.Buffer 代替了 newBuf 这个额外的对象。
同时也将函数的返回值简化,只返回处理后的 []byte 和可能的错误,避免了空值的返回。最后,增加错误检查,保证代码健壮性。
以上就是Golang使用ChatGPT生成单元测试实践的详细内容,更多关于Golang ChatGPT单元测试的资料请关注脚本之家其它相关文章!
相关文章
